Share a dashboard

In the previous tutorials, you have only used what is called the Serenytics studio. The URL you use is https://app.serenytics.com/studio. This web application is dedicated to the creation of dataflows and dashboards.
Serenytics provides another application called the Serenytics Viewer. This application allows its users to read dashboards shared with them. It is very simple to use and does not require any training. The URL to access this application is https://app.serenytics.com/viewer.
When we say "share a dashboard to a user", we mean that we want this dashboard to be available to this user in its viewer application.
Dashboards are usually shared to users of type "viewers" (they can only open the viewer app, not the studio). But you can also share dashboards to a studio user.
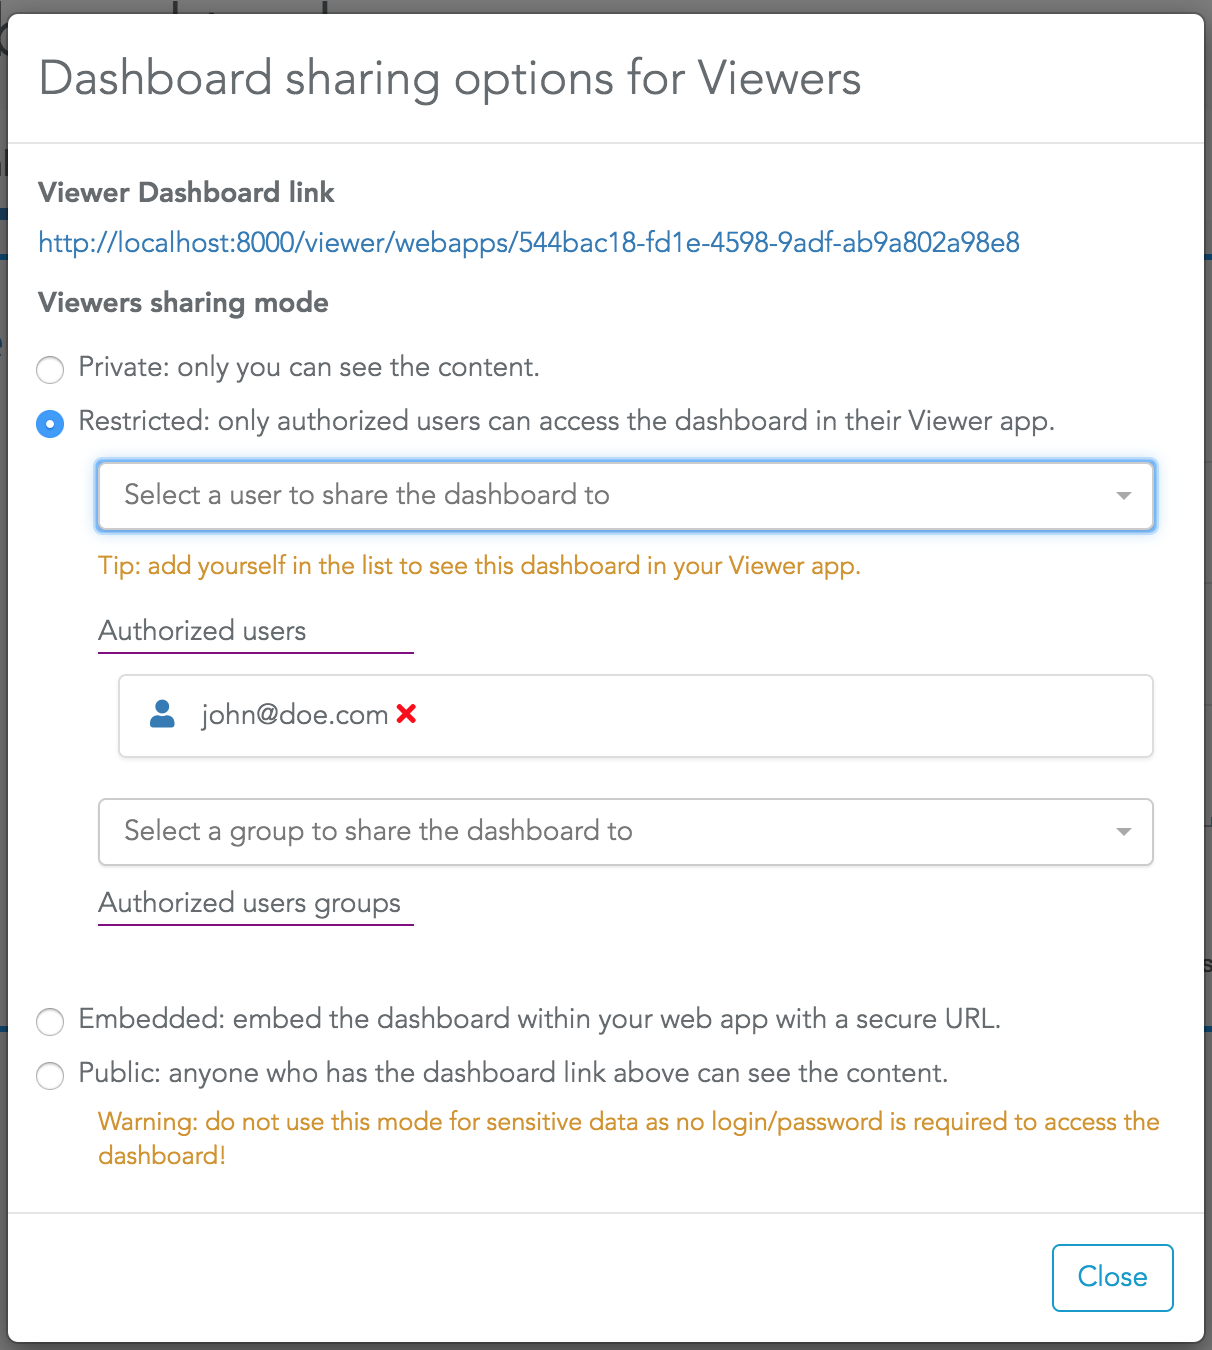
To share a dashboard to a given user, this user must exist in Serenytics. If the user already exists, you can skip this paragraph.
If you are an Admin user, you can create a user following the next steps. If you don't see the Admin menu, you're not an Admin user and can't create new users. If the user does not exist and you're not an admin, you need to ask your admin to create it for you in Serenytics.
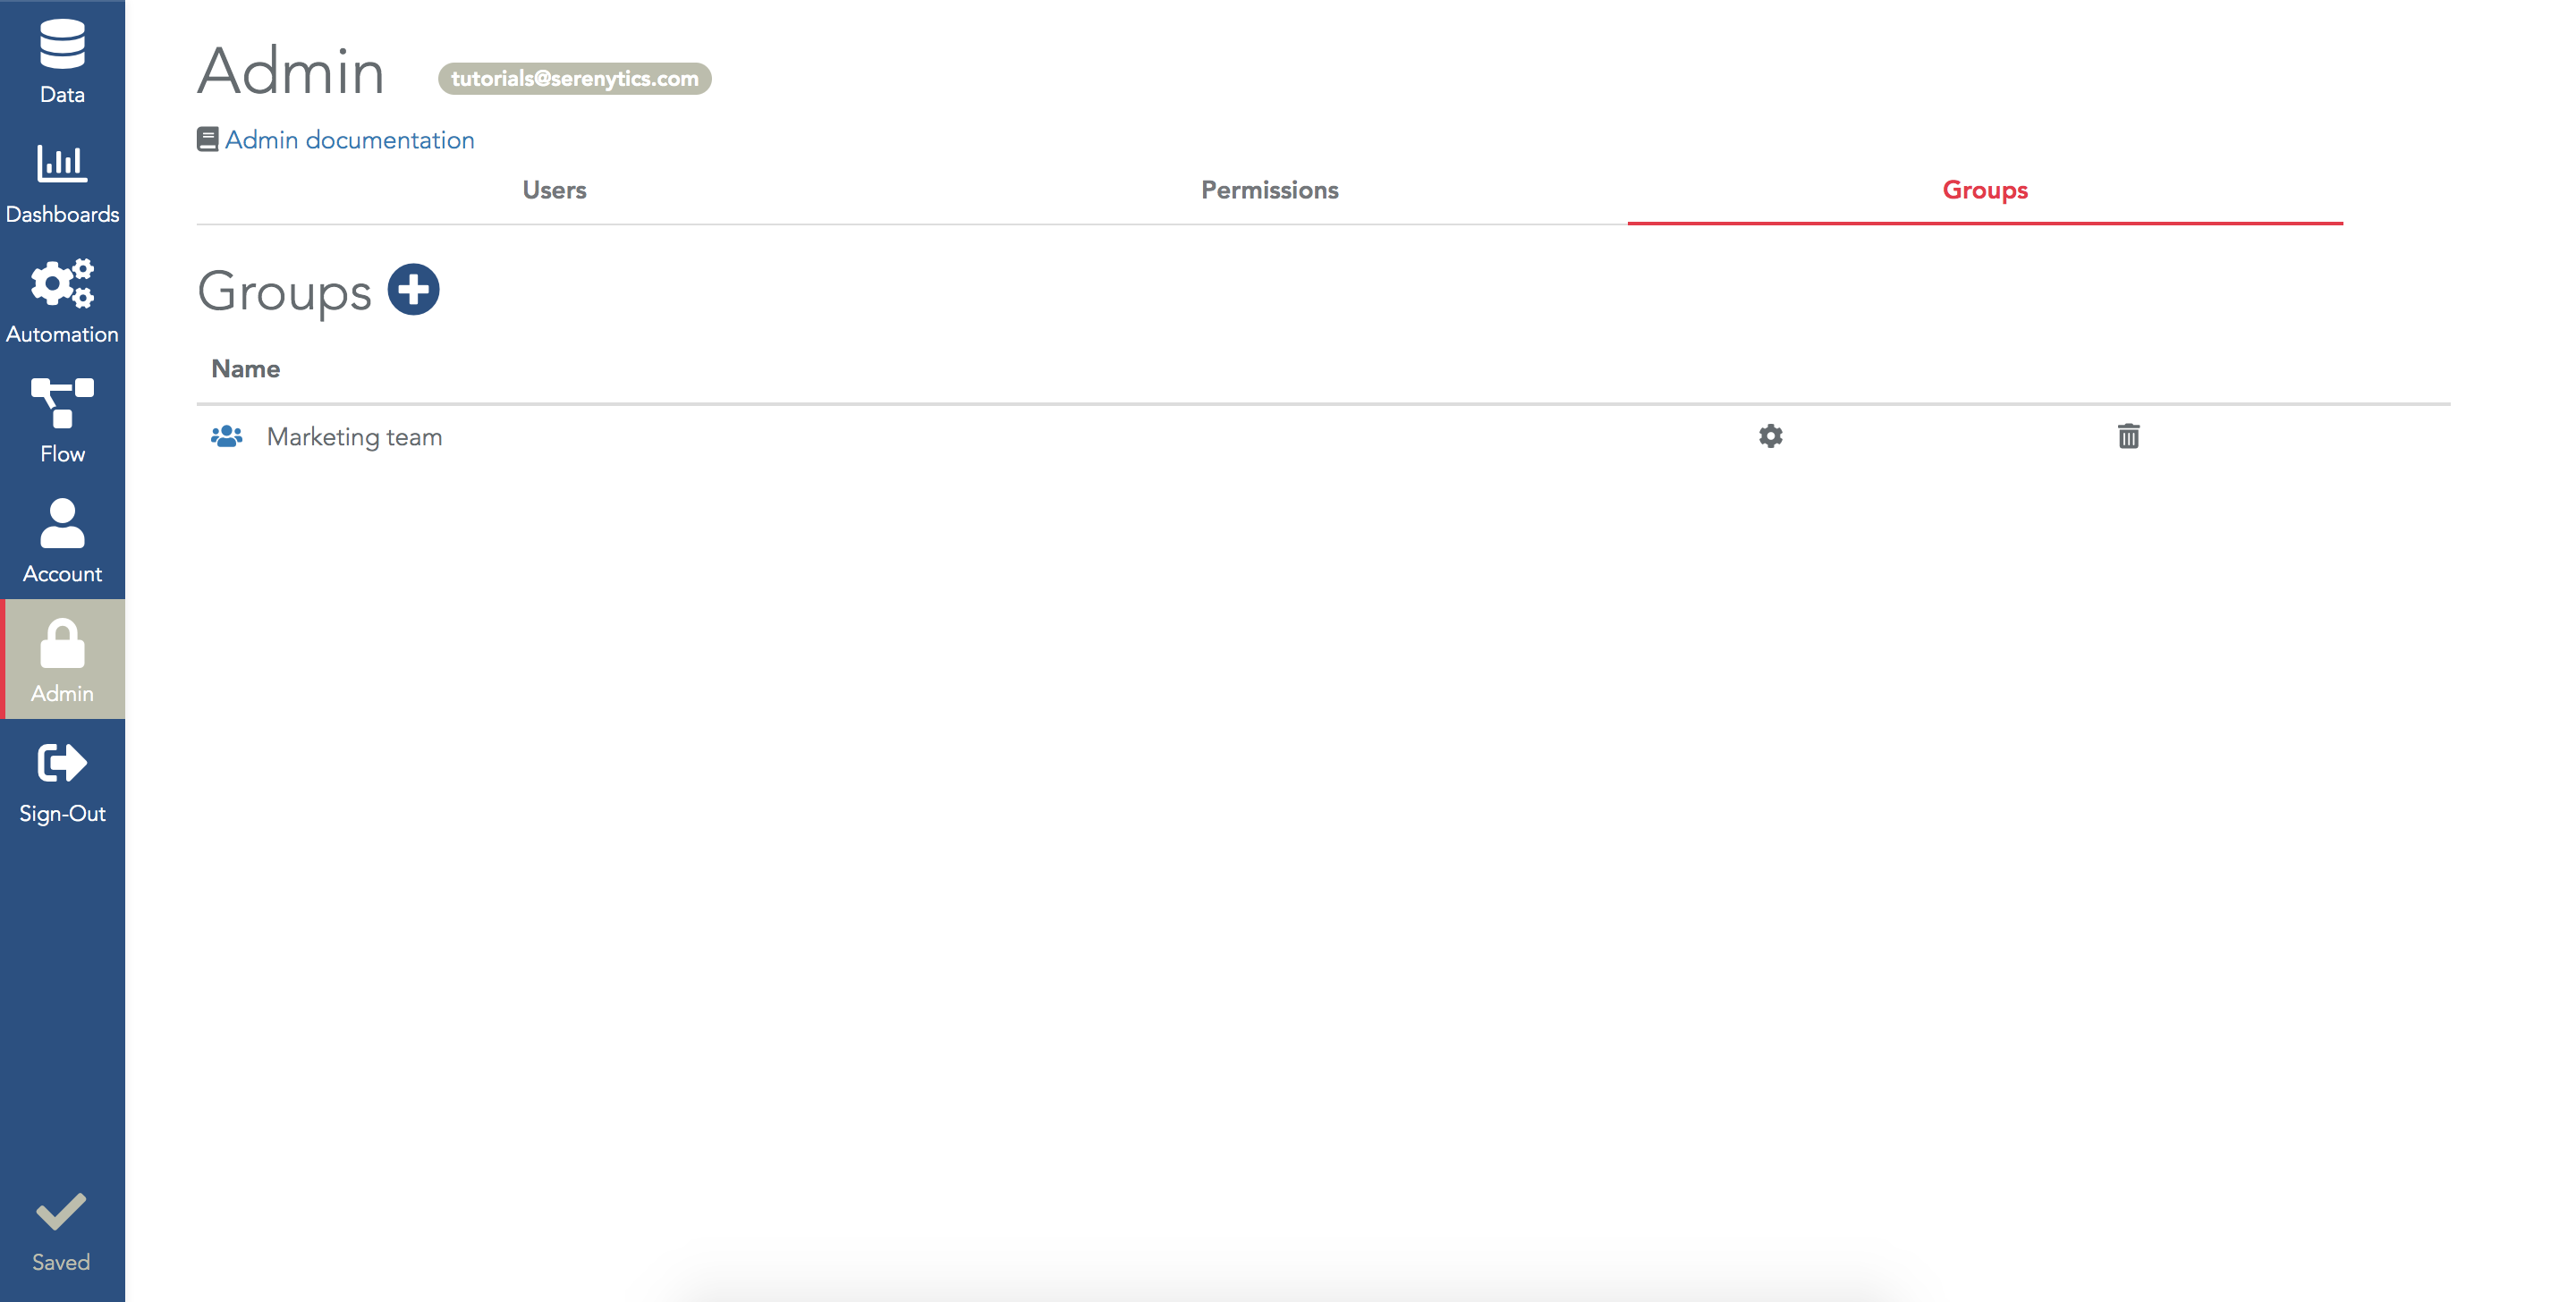
To create a new user, open the Admin menu: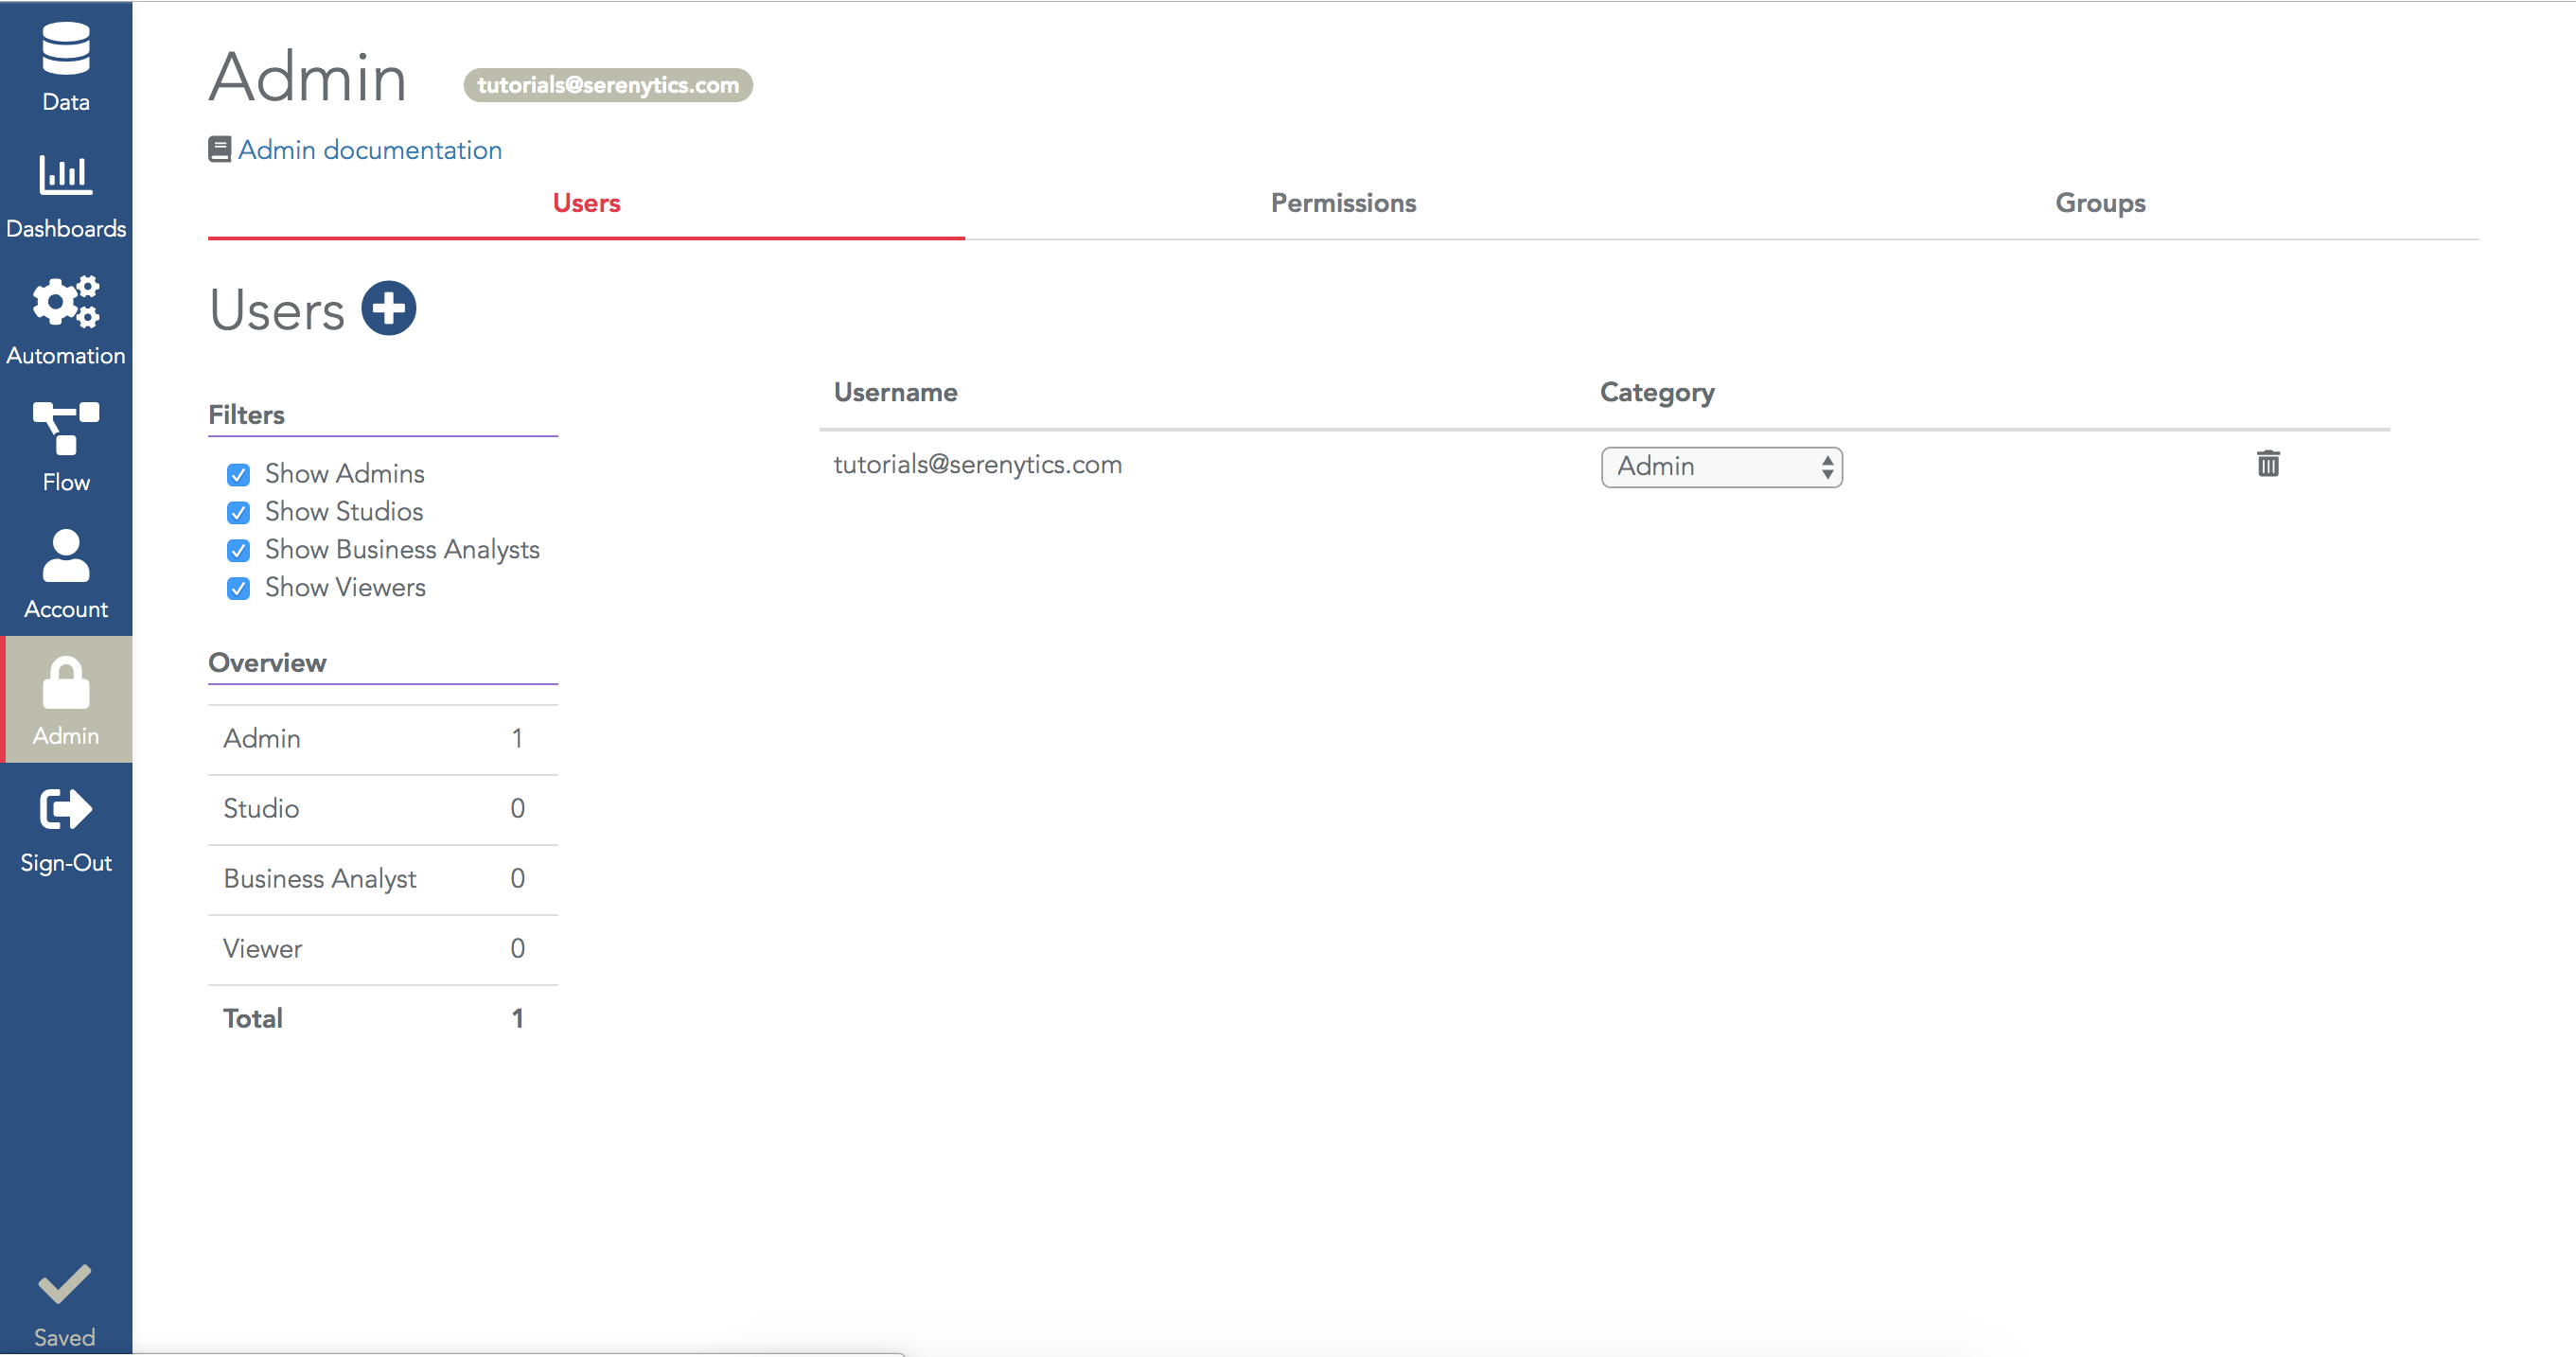

Tip: in your dashboards list, right below the name of a dashboard, the current dashboard sharing mode is displayed. If you click on this mode, the same sharing options dialog pops up.
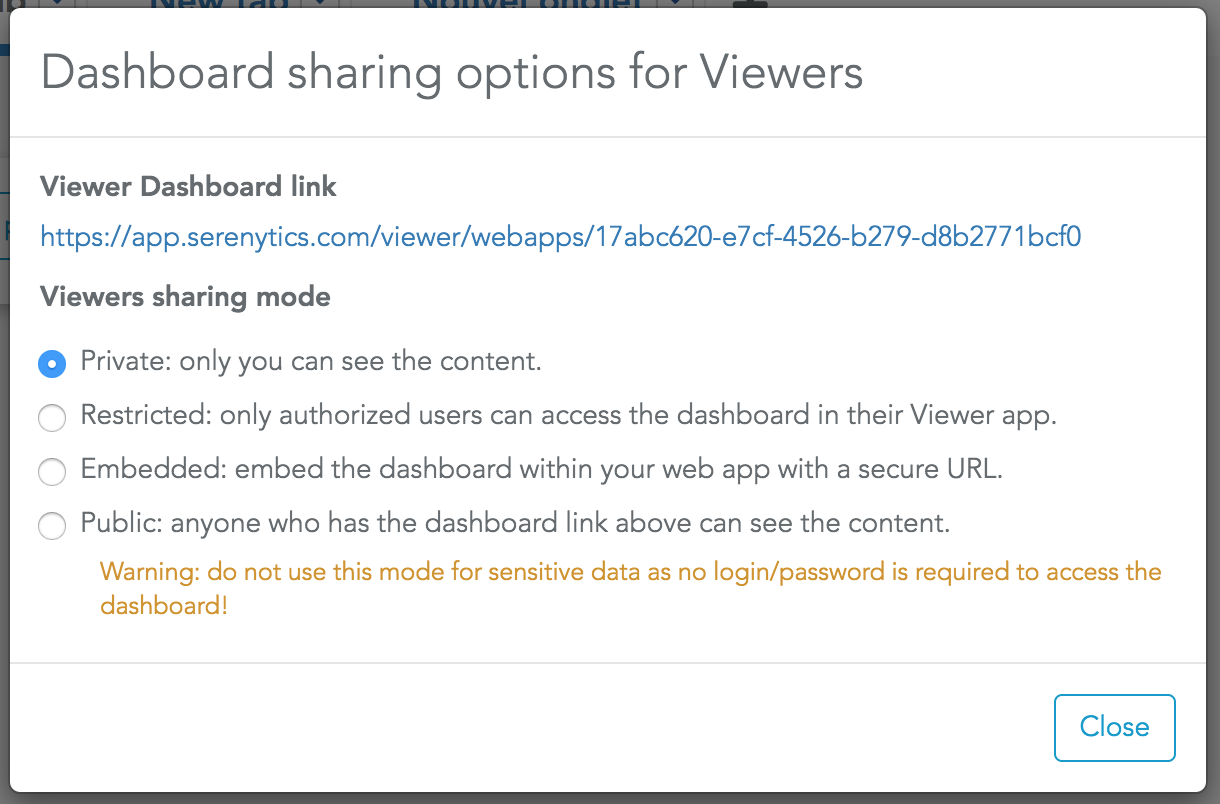
The three other modes are:
- Public: in this mode, the dashboard can be accessed without a Serenytics login. You can copy the dashboard link (at the top of the dialog) and send it by email to anyone. The recipient of your email can open this link without any login/password verification. DO NOT USE this mode except for public data.
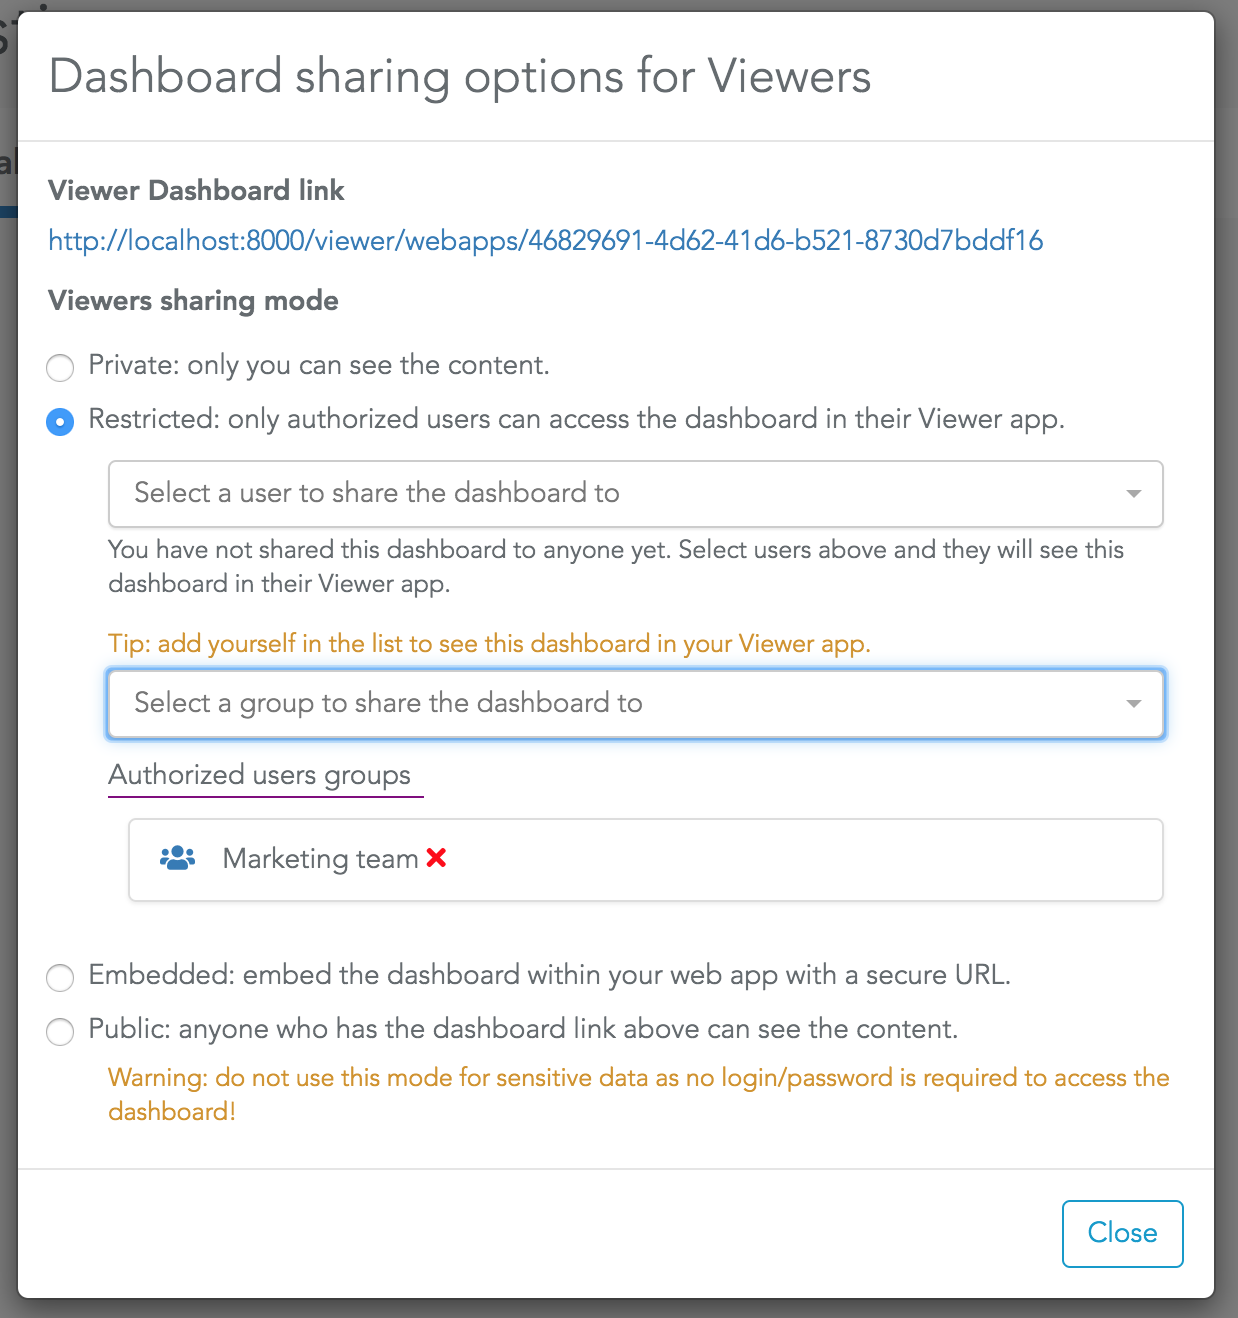
- Protected: that's the main mode where you specify which Serenytics users (or groups of users) can access this dashboard. Details are provided below.
- Embedded: this is a very specific mode used to embed dashboards within another web application. This is only used if you are a software editor or an advanced user.
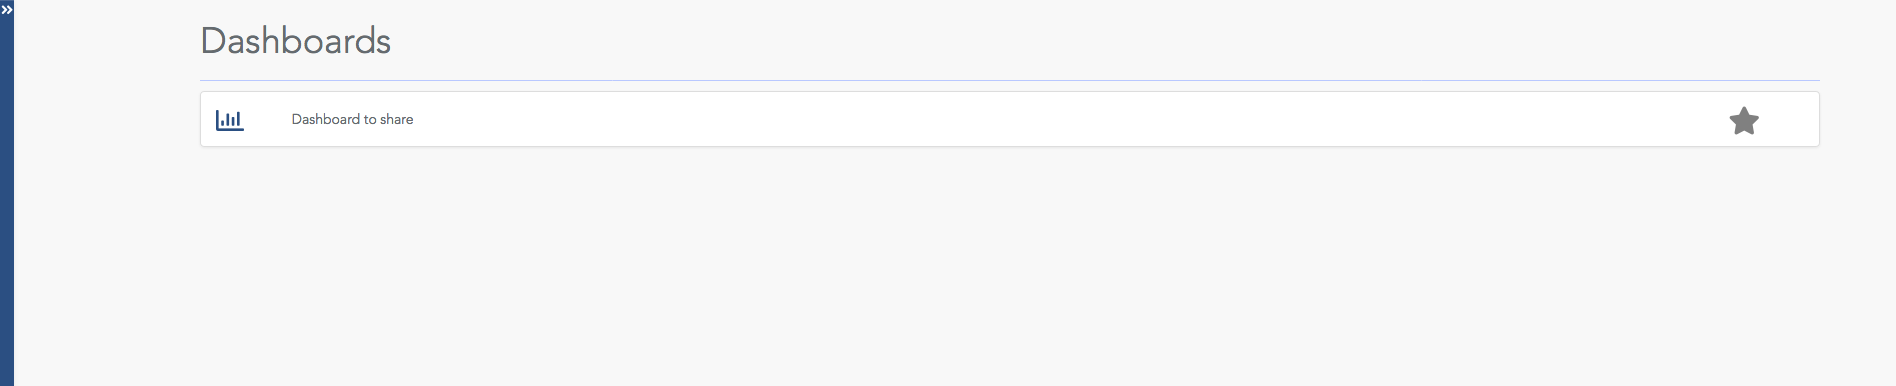
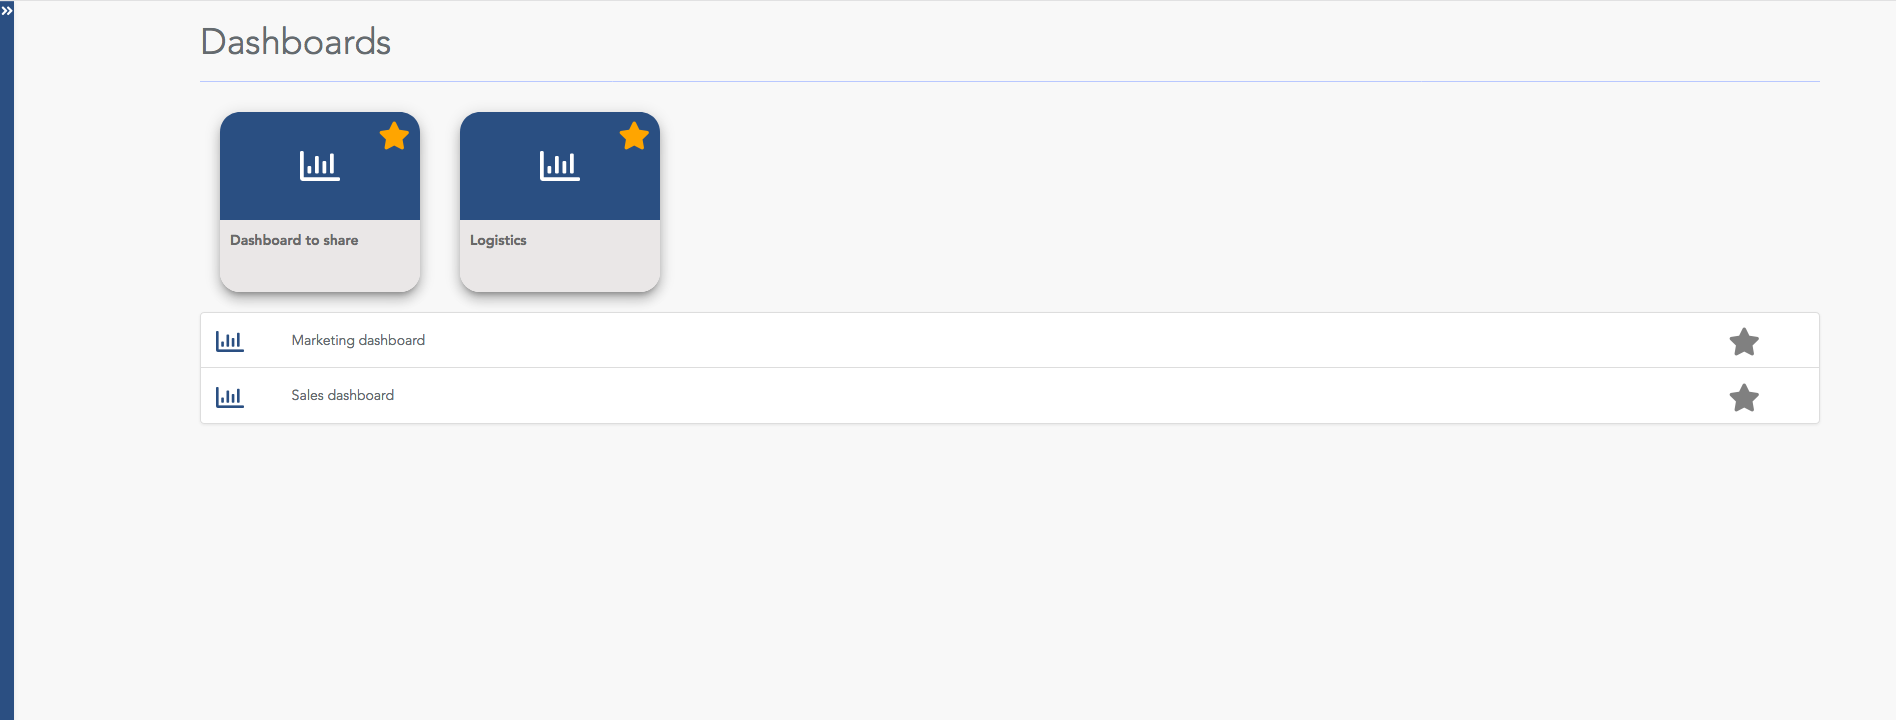
He can click on one dashboard to open it (without the possibility to modify it).
In the Viewer app, a user can click on the star icon on the right of a dashboard to set it as a favorite. The selected dashboard will stay at the top of the list in a large icon.
To share a dashboard to several users, you can repeat the steps. But if you have many of them and many dashboards, that's not practical. Instead, you should use groups of users.
The process is very similar. You must first create the users as above. Then you need to create the groups (in the tab Groups of the Admin menu). Once a group is created, click on the cog icon to add users to this group.
And then, in the sharings options of a dashboard, select the groups instead of the users. The users of the selected groups will have access to this dashboard in their viewer app.