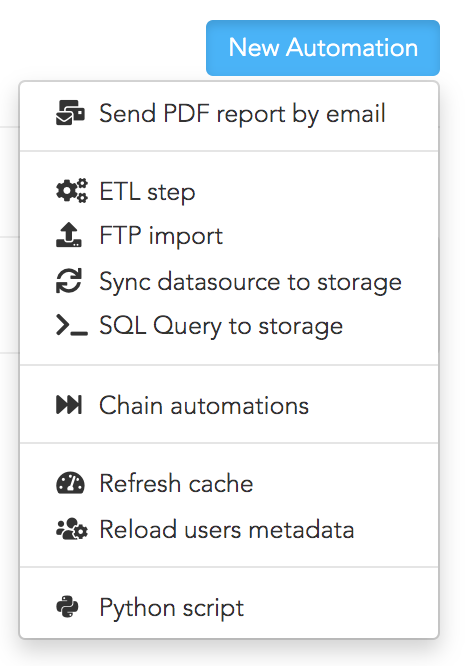
Create an ETL step to prepare your data

Svg background
Overview
An ETL step extracts data from an input datasource, transforms it and stores the result in an output datasource:
  • The input datasource can be of any type (a SQL table, a Storage, a file...).
  • The output datasource is always a Serenytics storage (i.e. a Redshift table).
  • The transformation can use aggregation, filtering, selecting columns or Serenytics formulas.

If you are used to SQL, an ETL step is similar to an SQL query that you apply to a given table and you store the query result in another table.

In Serenytics, an ETL step is an "automation" object as it can be scheduled. In many projects, ETL steps are required to prepare the data before showing it in widgets such as barcharts or tables in dashboards.

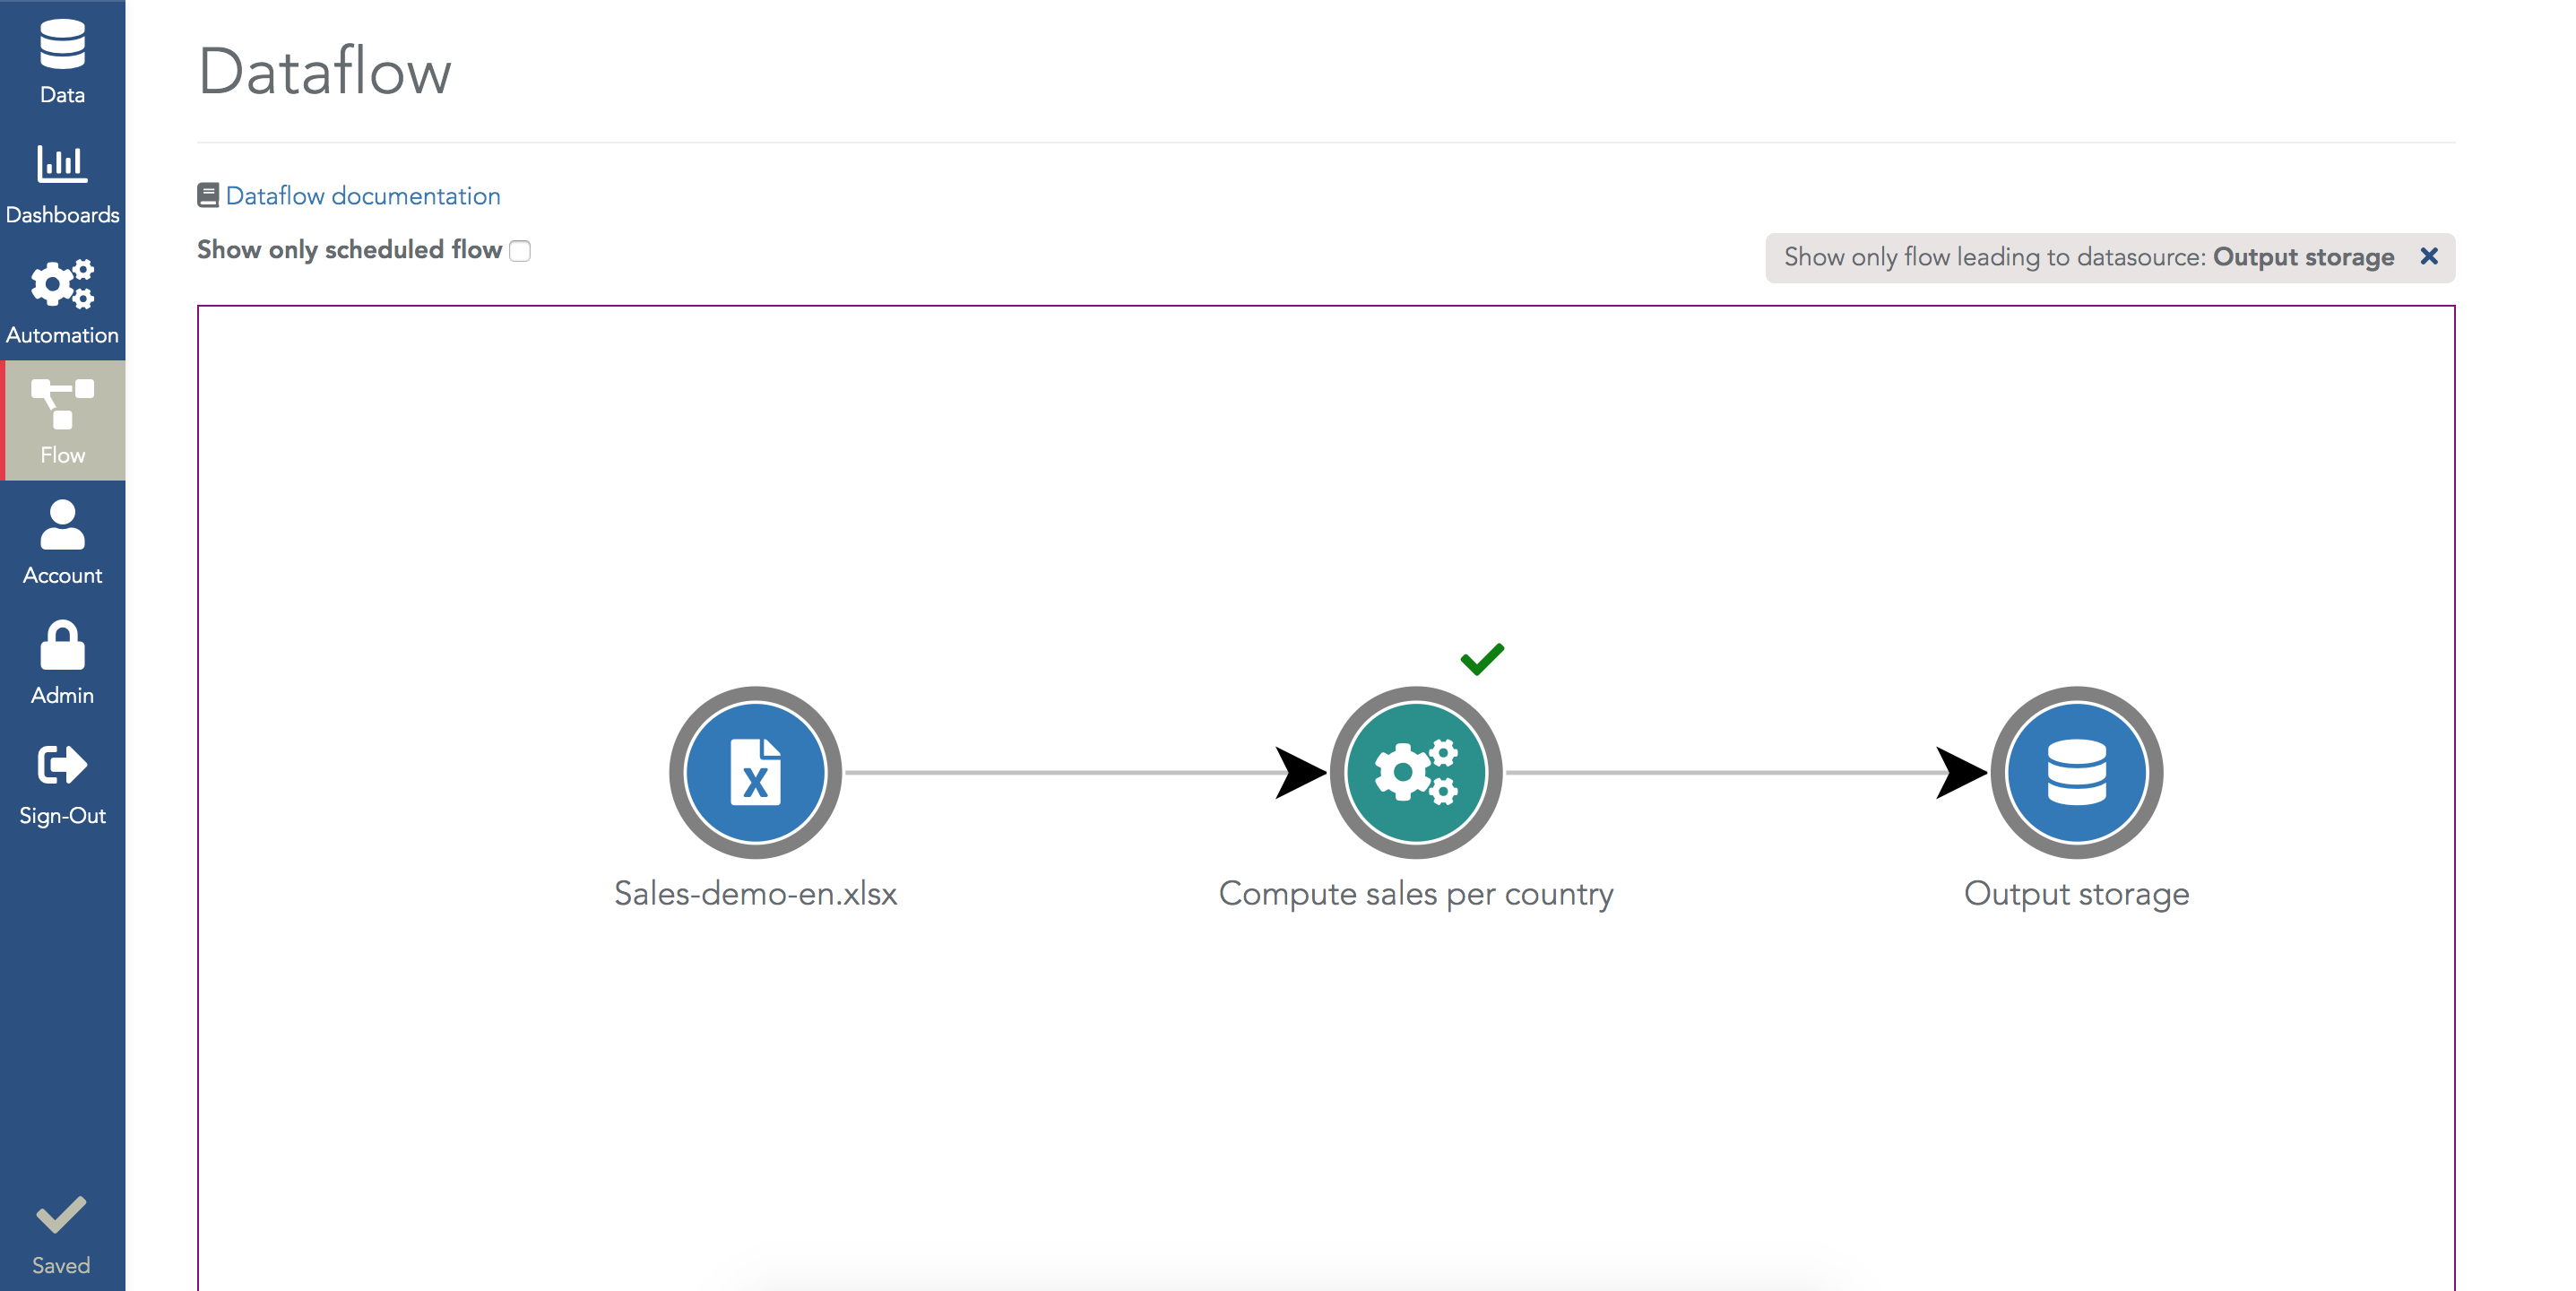
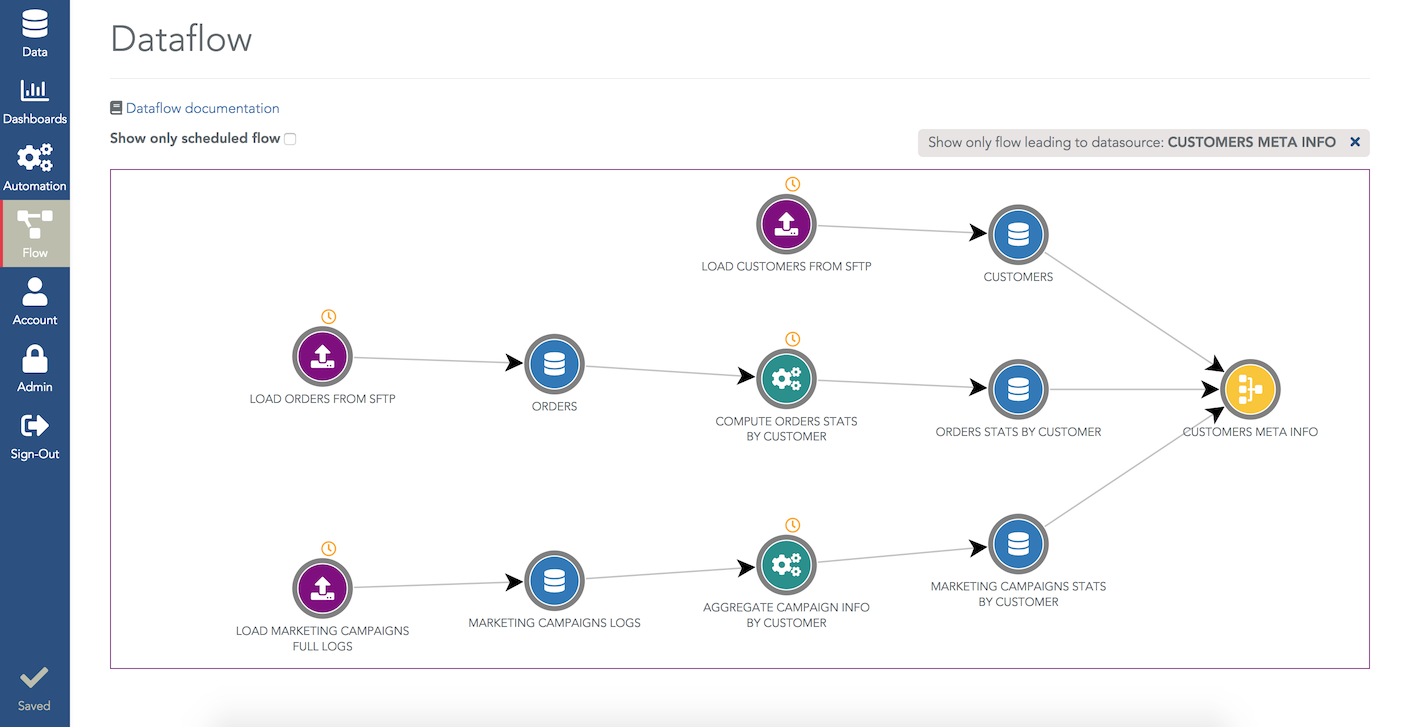
Once you have created several ETL steps, the dataflow menu lets you visualize these data preparation steps (ETL steps, and also all the data loadings steps and Python scripts):

Example of a flow chart. ETL steps are in green circles.
Create the destination storage
The very first step before creating an ETL step is to create the Serenytics storage where the ETL step output rows will be stored. To do that, in the datasource menu, click on the button "New Data Source" and select "Storage" in the "Serenytics Datawarehouse" tab:
Create a storage datasource
Create the ETL step automation
In the automation menu, click on the button "New Automation" and select "ETL step":
Create an etl step
When the automation is created, its default name is "New script". A good habit is to rename it correctly (click on its name and write the new one).
Configure input and output datasources
When an ETL step is created, its configuration is empty. In its settings, you must provide its input datasource where the data will be taken from (it can be a file, an SQL database, a Serenytics storage, a join...). In the output field, select the storage you've just created in the first step of this tutorial:
Configure input and output of etl step
Tip: the icon right beside "Output source" and "Input source" is a shortcut to open the corresponding datasource page.
Configure the data transformation

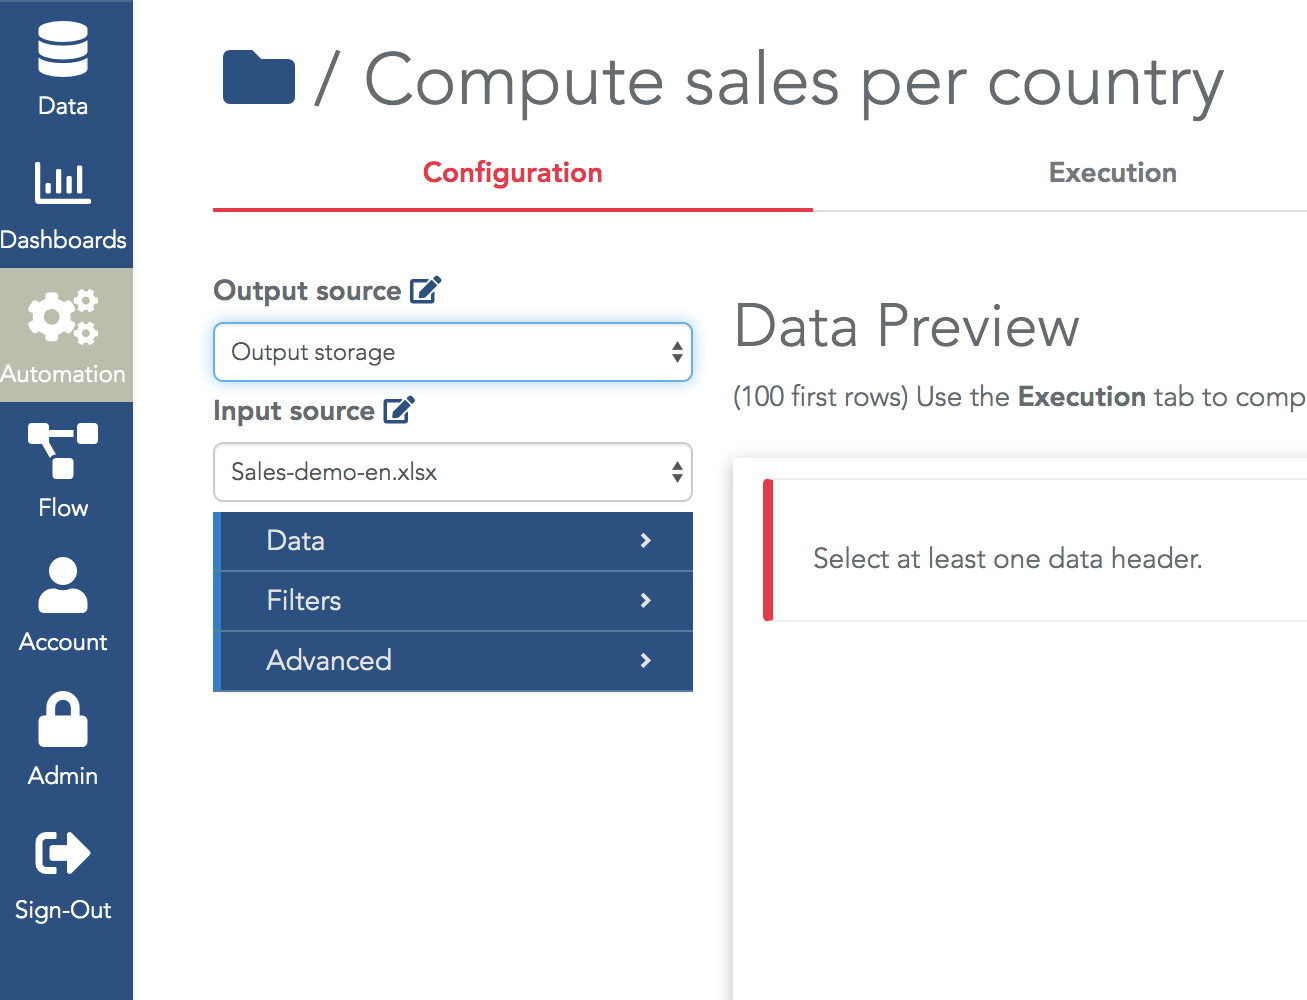
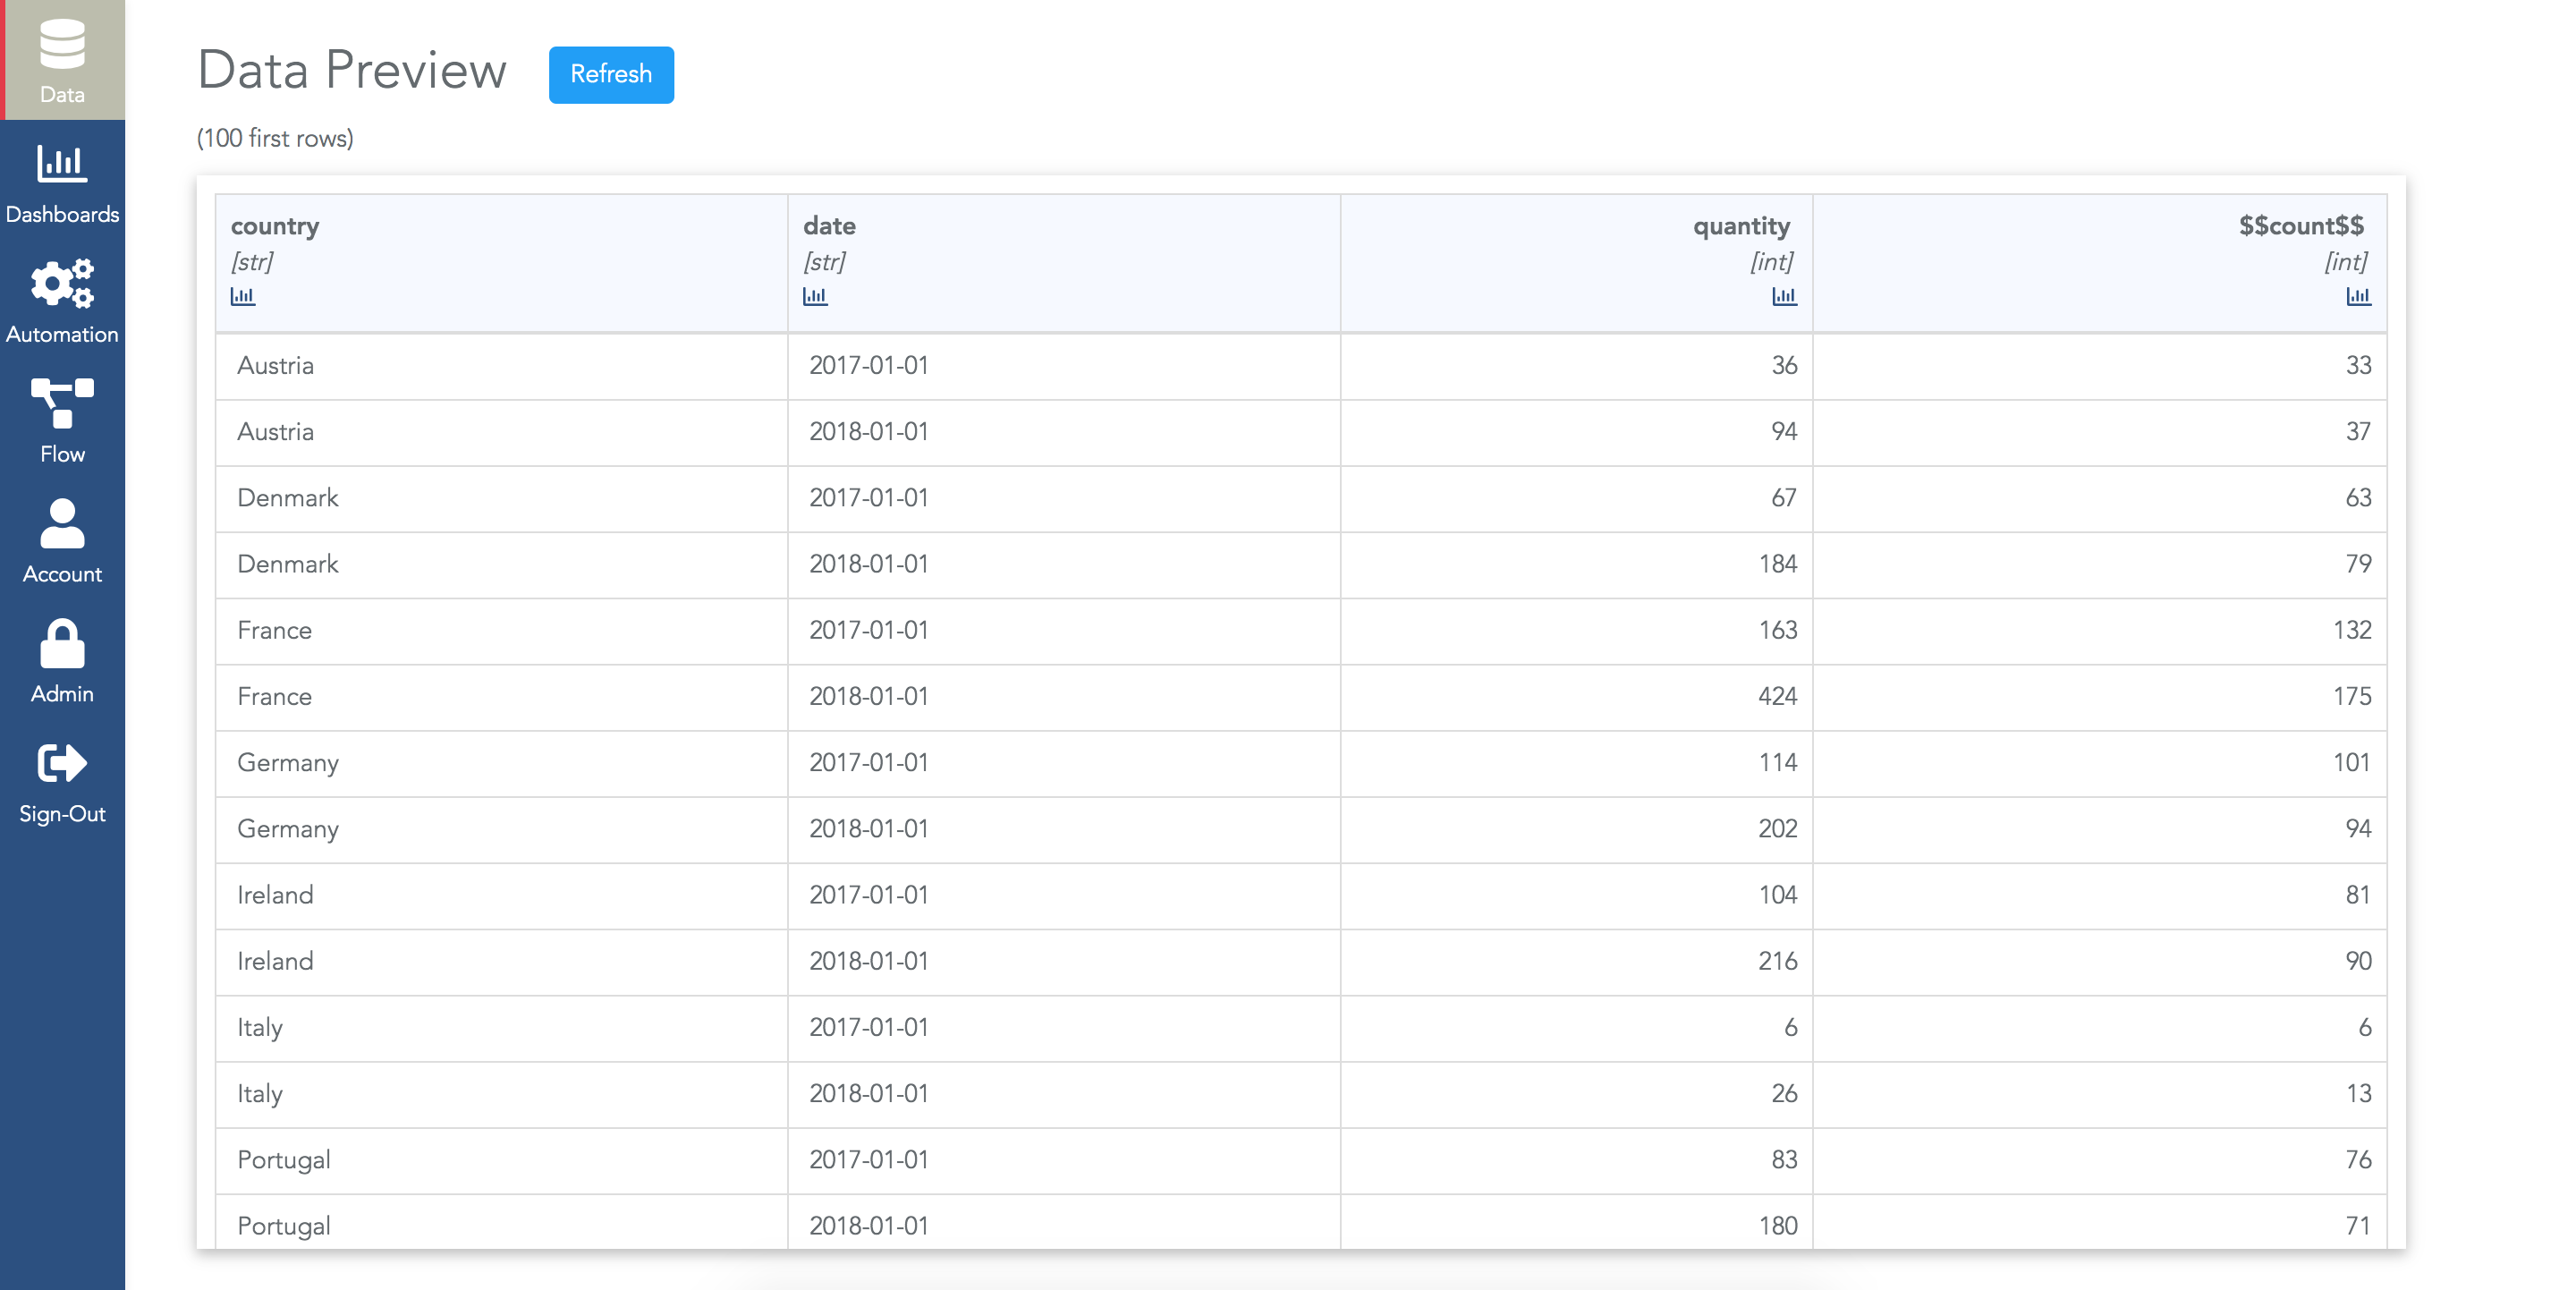
The next step is to actually define the query applied to the input datasource. In the "Data" section, configure the "groupBy dimensions" and the "Measures".

In both fields, you'll find the list of columns available in the datasource plus the list of formulas you added in the datasource.

As soon as you modify these fields, the data preview will show you a preview of the result (keep in mind it's only a preview, the output storage has not been filled yet):
ETL step preview.
Another common configuration is to filter the rows to consider in the query (using the "Filter" section of the ETL step settings menu).
ETL step execution

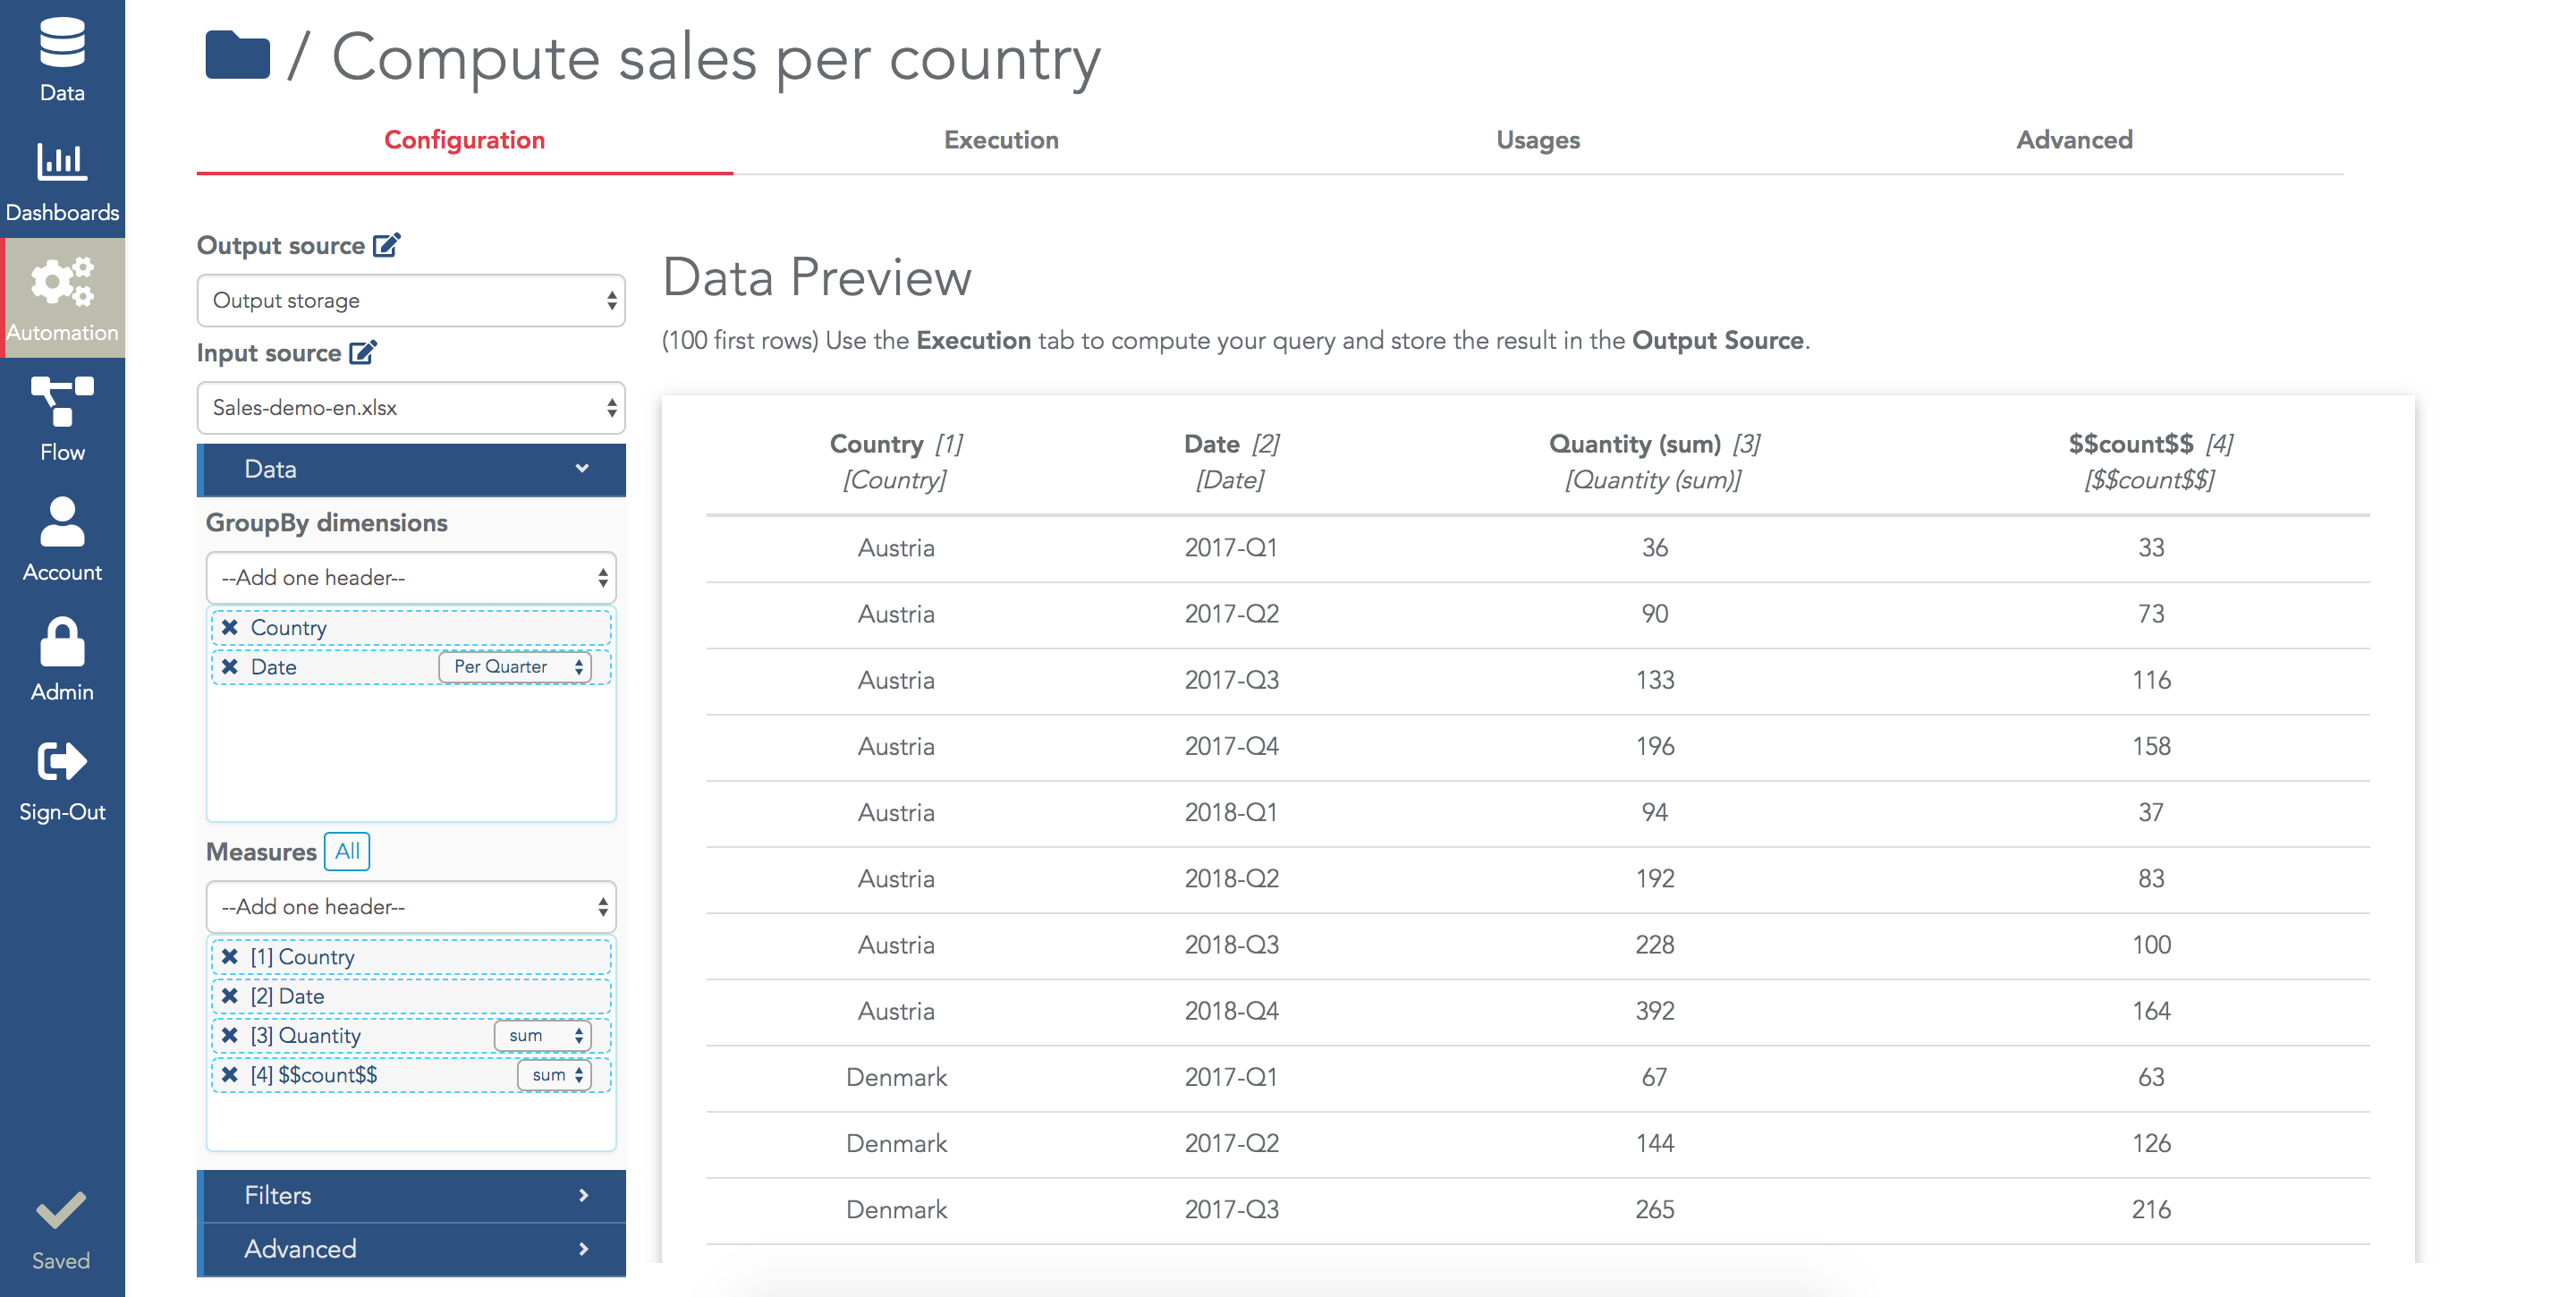
When the configuration is valid, the preview shows the first 100 rows of the result. It's important to keep in mind that the result has not been stored in the output storage so far.

You need to "execute" your ETL step: in the tab "Execution", click on "Execute Now". Your execution is triggered and when the ETL step execution is finished, you'll see a new row in the "Last 10 Executions" table:

Execute an ETL step

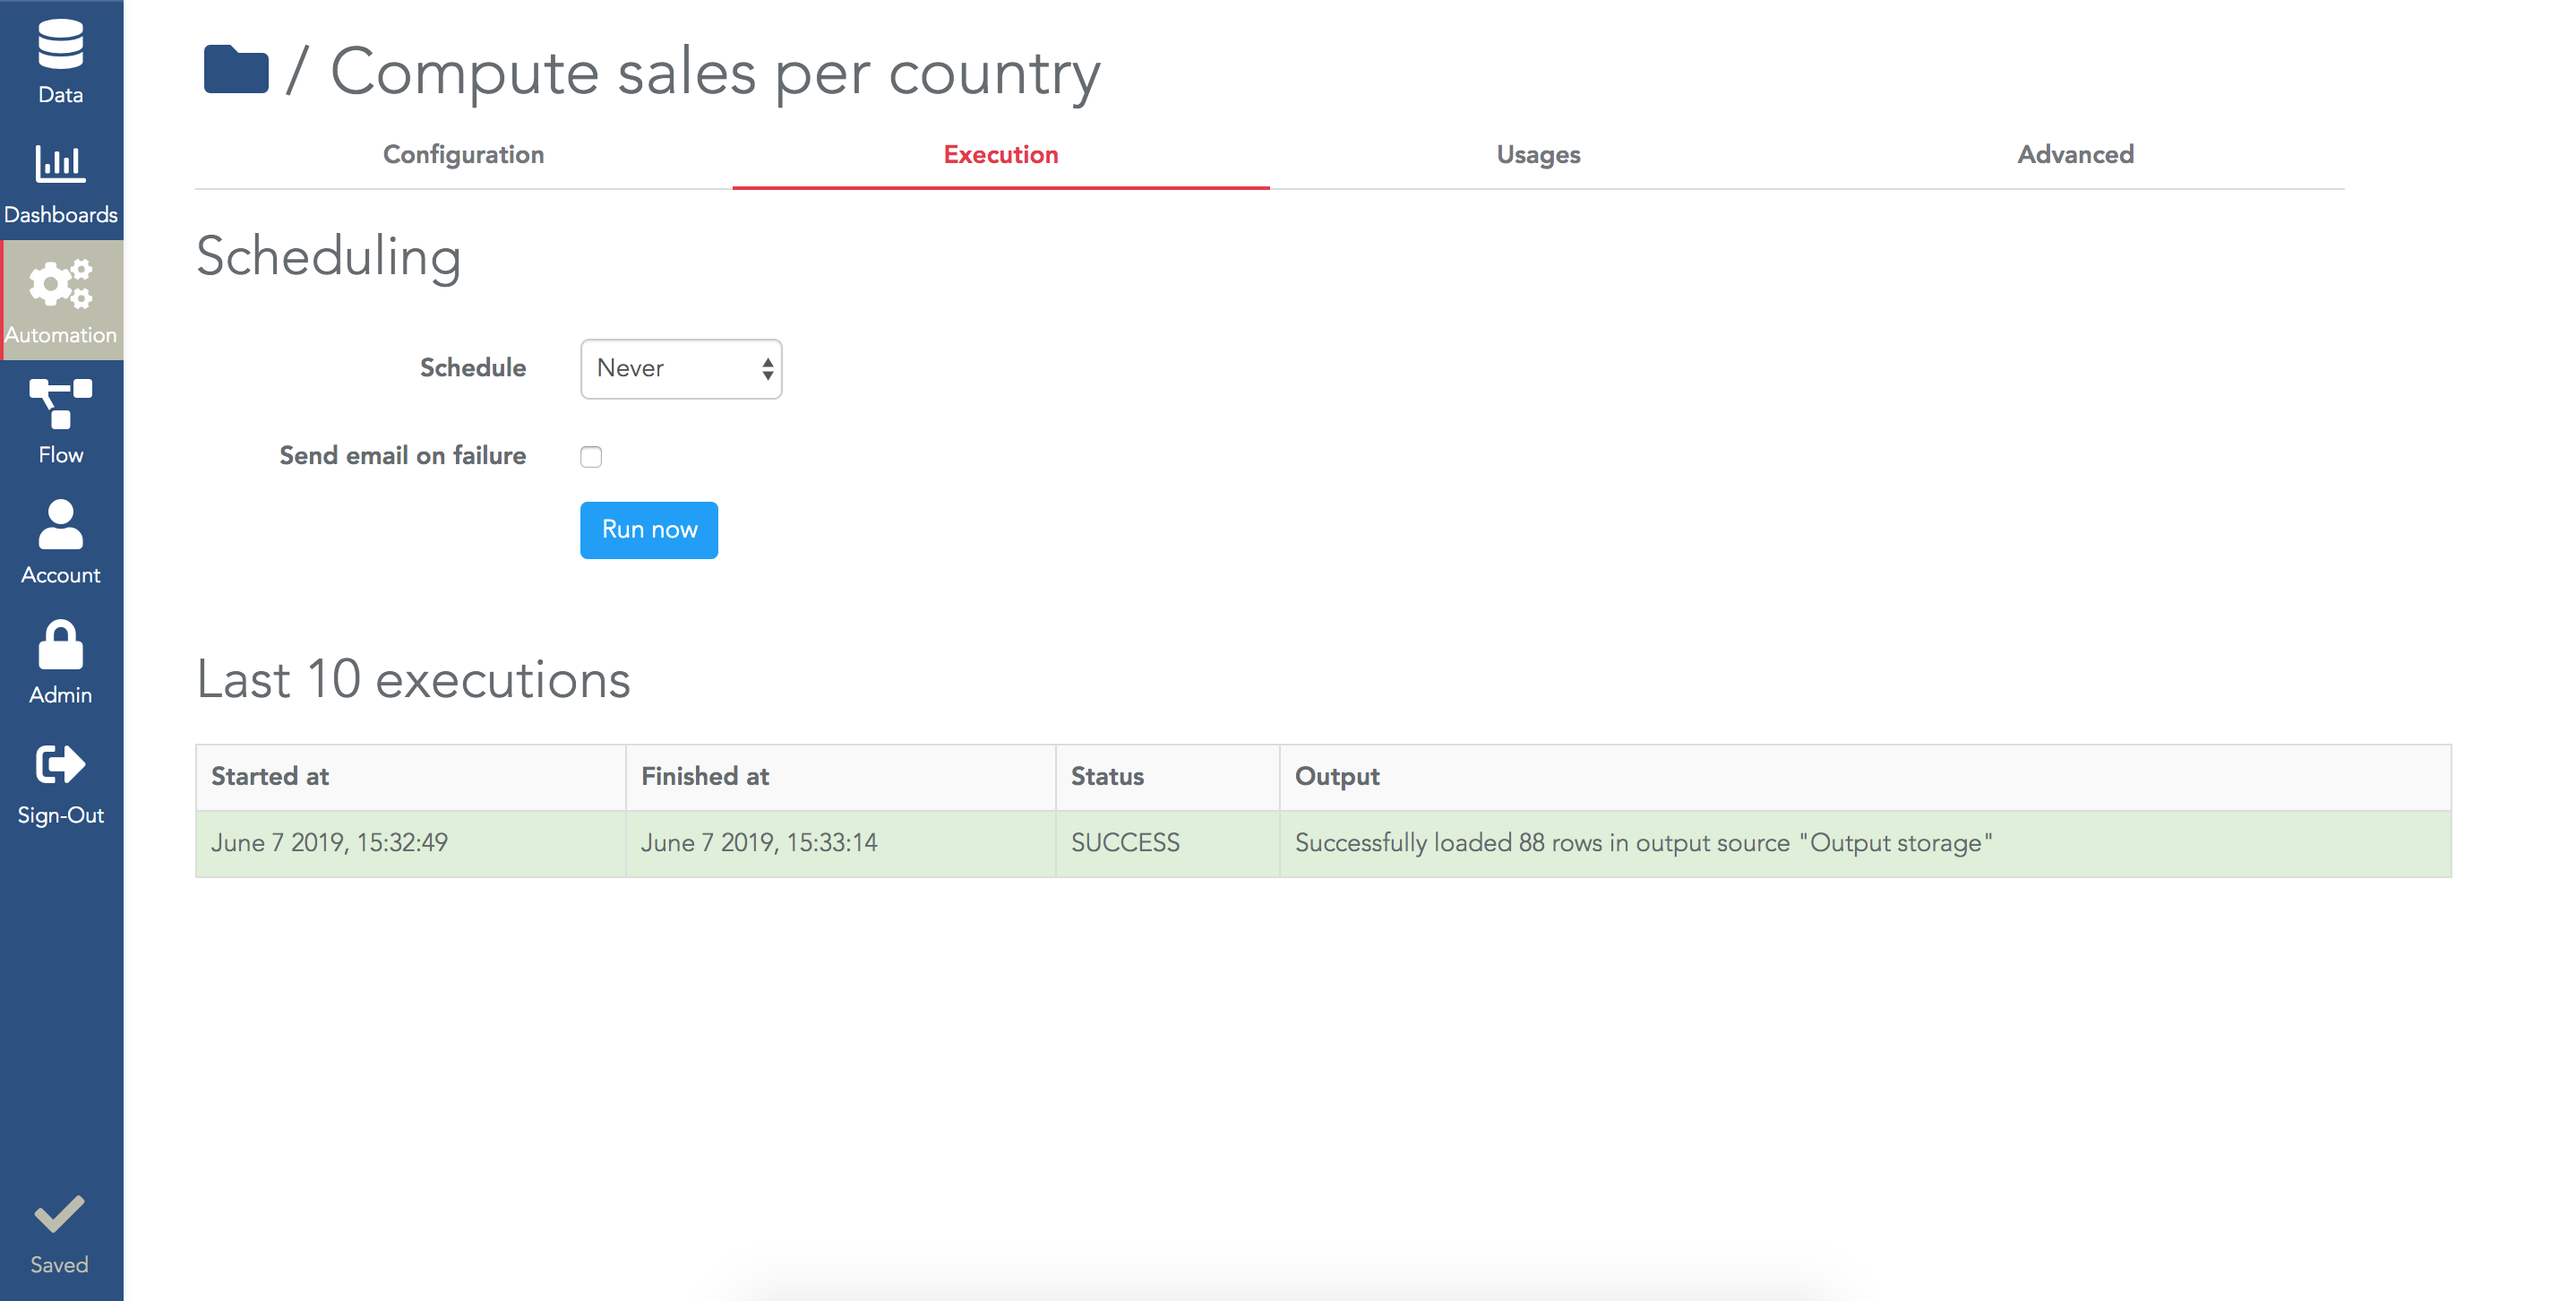
Of course, you can use the scheduling field to schedule your ETL step (e.g. to run it once a day).

A common way to manage the execution of multiple ETL steps is to have them in a "chain task" that will execute several ETL steps one after the other. And instead of scheduling each ETL step, you only schedule the "chain task" (see the dedicated tutorial).

Rename output columns
If you open the output storage after the ETL step execution, you see the Data Preview has been populated with the result of the query:
Output of an ETL step

The column names are the default ones. In many situations, you'll want to rename these names.

For example, the $$count$$ column can be renamed "Nb of invoices" in the example of this tutorial. To do that, in the configuration of the ETL step, click on the header of a column in the preview and enter the new name of the column:

Rename an ETL step column

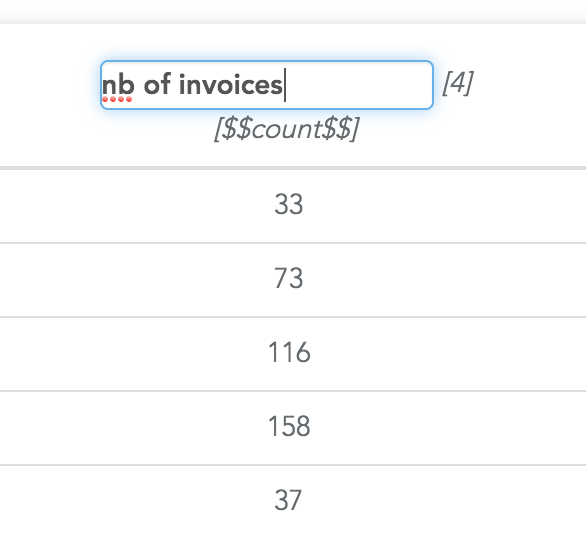
The text right below the edited name is the default name. The number right beside the column helps you to find it in the list of selected measures in the ETL step settings (it is helpful when there are many columns).

Of course, to have the columns renamed in the output storage, you'll need to execute again the ETL step.

Corresponding dataflow
When you open the output datasource page, in the "Usages" tab, in the "Automations using this data source as output source", you see that this datasource is used in the ETL step just created. You can click on the ETL step here to open its configuration.
Output datasource usage
Moreover, there is a link "Show dataflow leading to this datasource". If you click on it, it will show you the dataflow (i.e. the graph of datasources and operations) used to build this datasource. It helps you to immediately see how the datasources are used in ETL steps to build a given storage. This example is very simple but it is more meaningful when you have a complex dataflow with many ETL steps.
Dataflow for an ETL step
Each node on this dataflow is clickable and will open its underlying object (i.e. an automation or a datasource).
Conclusion
You can now create as many ETL steps as you need to prepare your data for your dashboards. The tool is very easy to use and very powerful when you apply it to formulas added to your input datasource. To keep your environment clean, remember to use meaningful names for your ETL steps and to organize them in folders.
×