Add dynamic filters in a dashboard

A dynamic filter is a selector the viewer can change to filter the data.
You may have seen in previous tutorials how to add a dynamic filter within a widget. In many cases, you want a global filter to be applied to all the widgets of a dashboard. This is done by creating a filters bar.
First, click on the filters bar icon in the list of widgets:

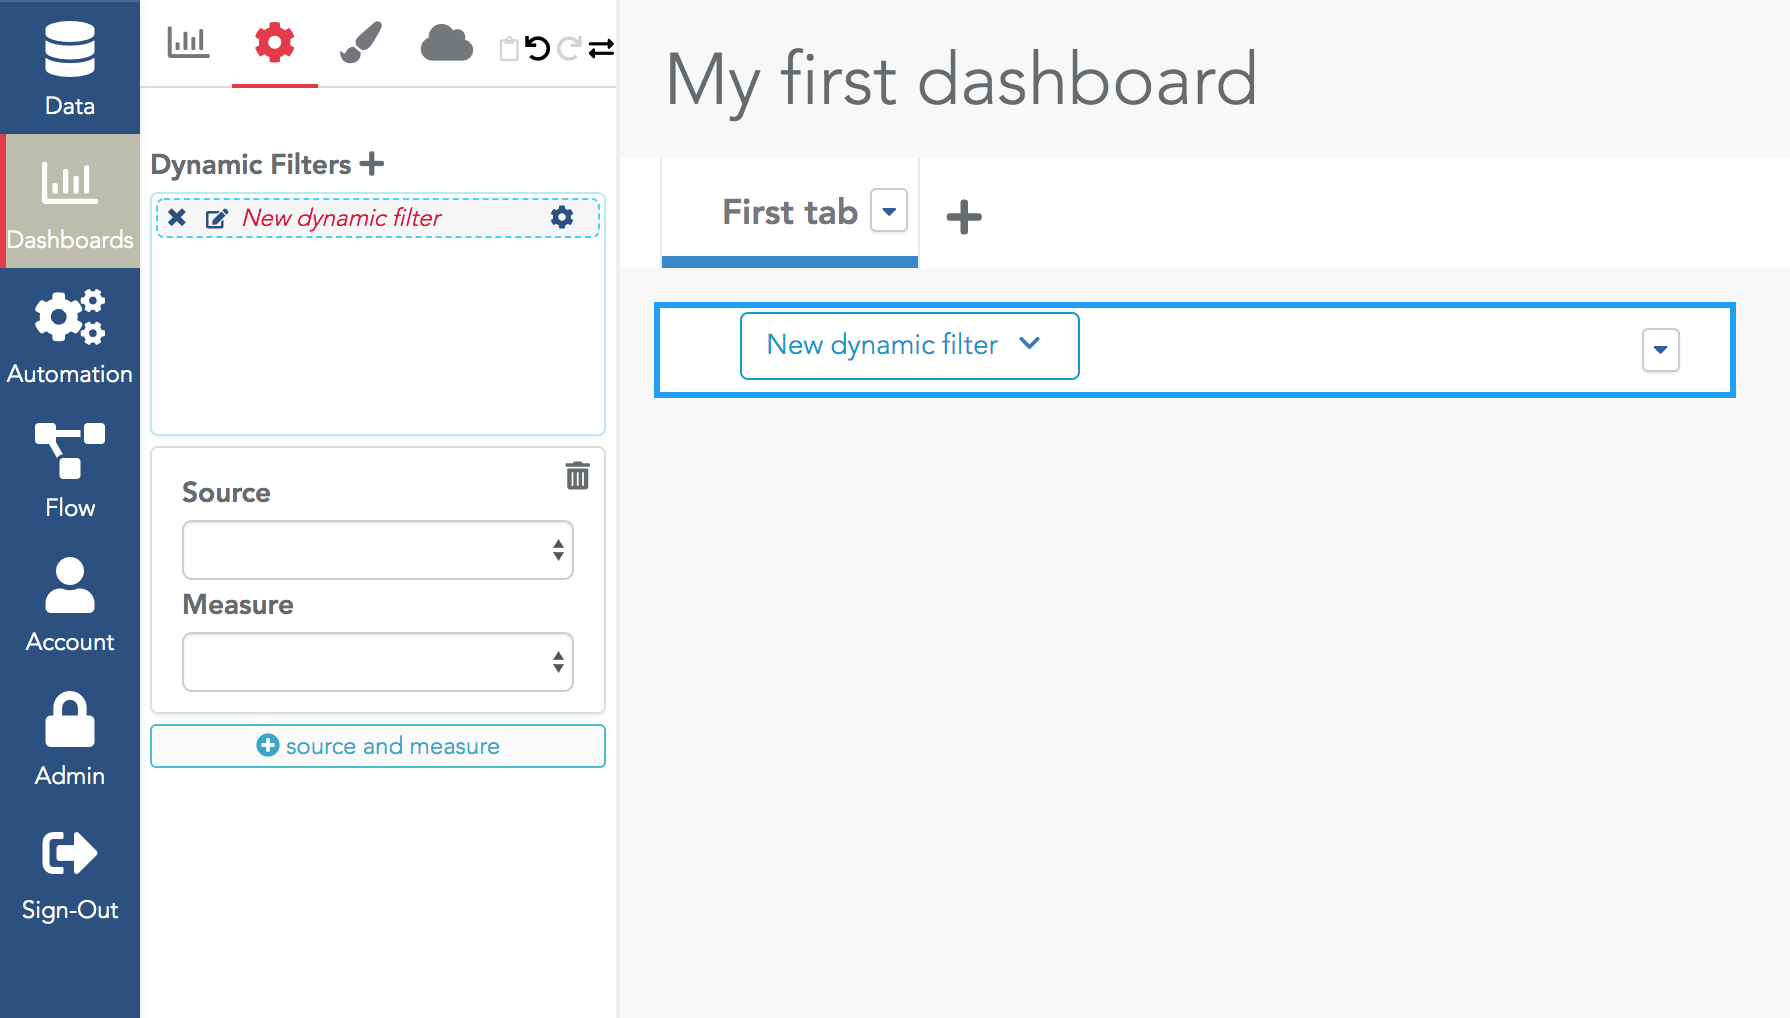
In the filters bar configuration, click on the "+" icon. This creates a first dynamic filter within the bar named "New dynamic filter".
In the configuration, click on this newly created filter to edit its properties:
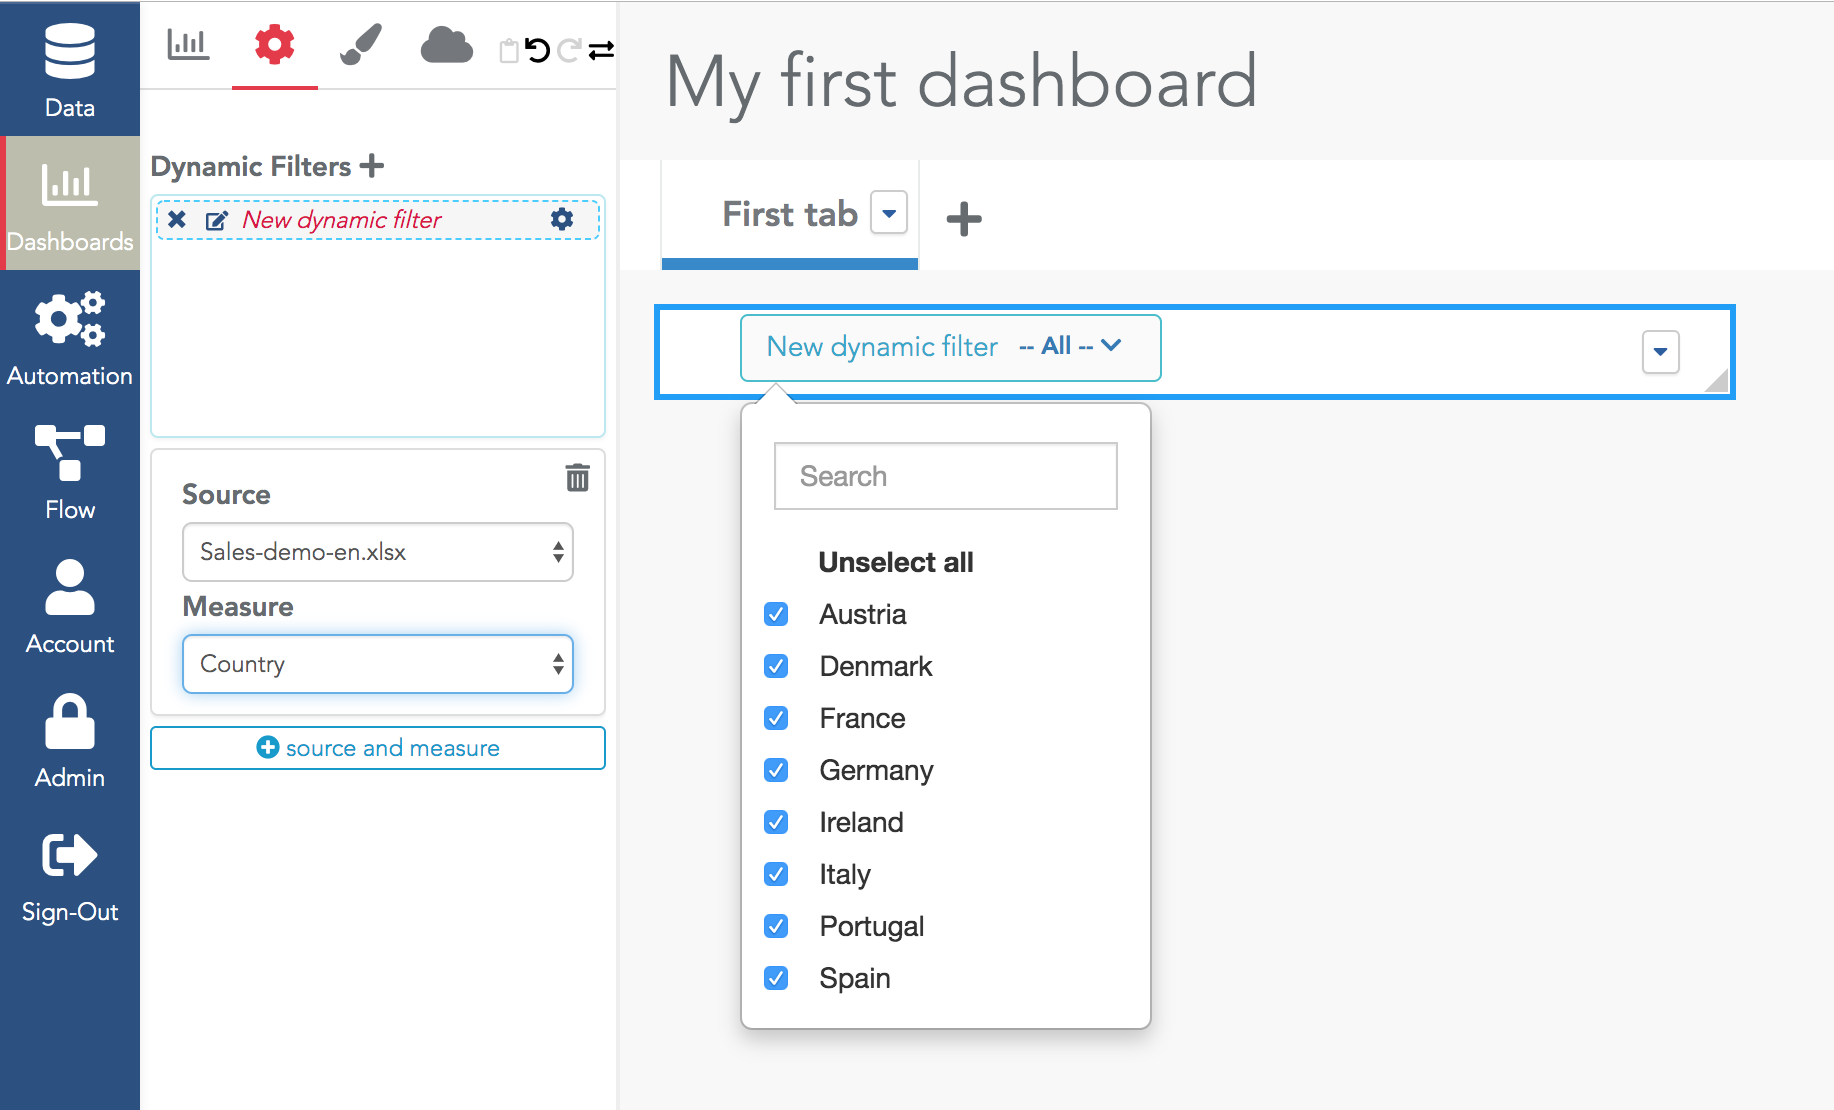
A dynamic filter needs at least one datasource and one column of this datasource. For example, in the example below, the column "Country" was selected. The dynamic filter is then automatically populated with all the possible values of the column "Country":
When this filter is modified by a viewer, all the widgets of the tab (not all the tabs) are filtered accordingly.
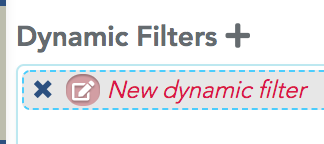
To rename a filter, click on the "edit" icon on the left of the filter name in the list of filters and enter a new name:

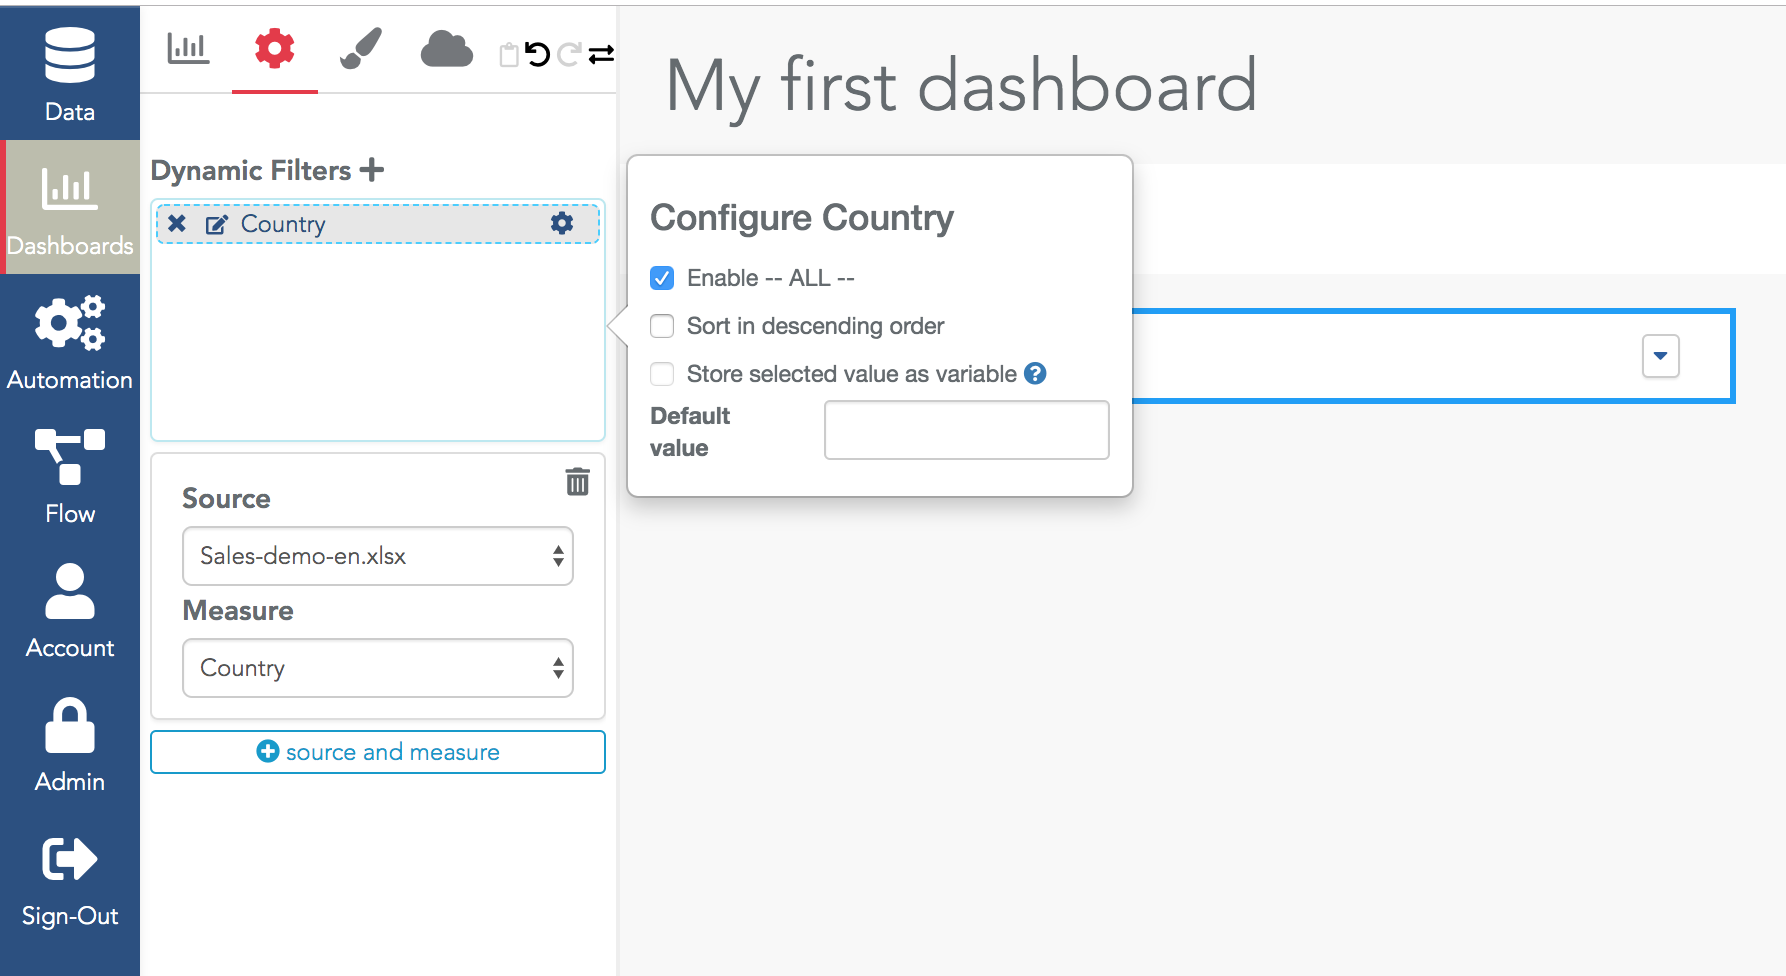
- By default, "enable-ALL" is activated: it means that the filter is a list of checkboxes (one per possible value of the column plus a "select all"/"unselect all" entry). If you disable this option, the filter will be a list of radio buttons and the user can only select one. By default, the first value is selected (in alphanumerical order).
- The "sort in descending order" lets you reverse the order of possible values in the filter. That's particularly useful for lists of dates (e.g. 2019-07, 2019-06...) where you want the most recent ones to be at the top of the filter.
- "Store selected value as variable" is an advanced option described later.
- "Default value" lets you choose the default value of the filter. The value you type here must be exactly one of the values among the possible choices.
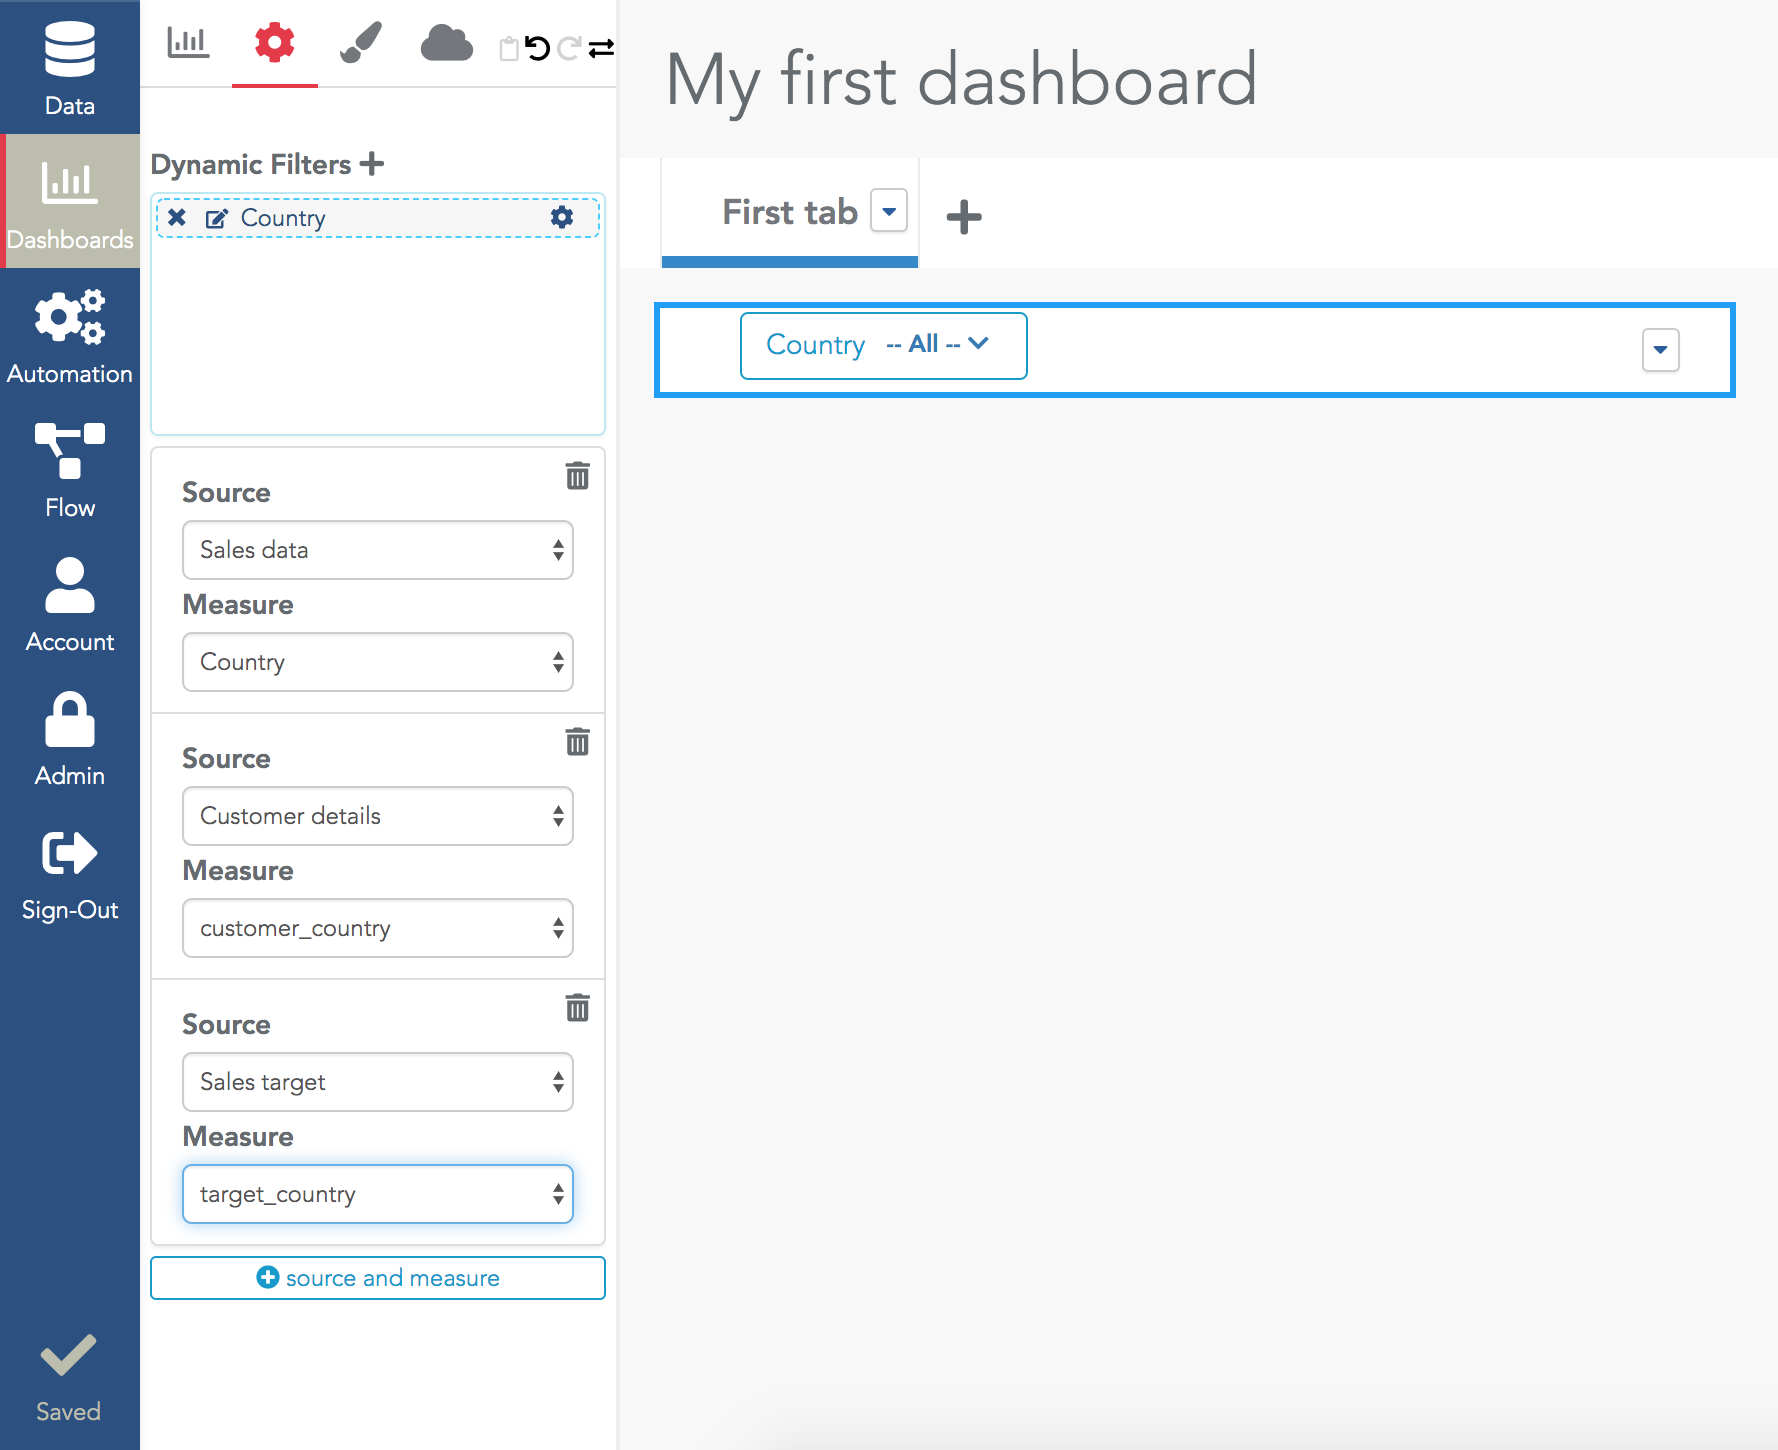
In many cases, you need to have a single filter (e.g. Country) to be applied on many datasources. For example, consider a dashboard with many widgets querying three datasources (e.g. one datasource with sales data, another one with sales targets and a last one with details about customers).
You want to have a single dynamic filter on "Country" in the bar and you want this filter to be applied to all the widgets (whatever their datasource). One issue is that in a first datasource, the "country" column may be in a column named "Country", but in another one, it may be named "customer_country".
To create such a filter, start by creating a dynamic filter on the first datasource and column. Then at the bottom of its configuration click on "+ source and measure" and fill the details of the second datasource/column to use in a filter. And add as many such couples as you need.
The dynamic filter will use the first datasource<>column of the list to obtain the list of possible values to display in the filter. But once a value is selected by the dashboard viewer, the filter will be applied to all the widgets using anyone of the datasources of the list.
Here is an example of this configuration:
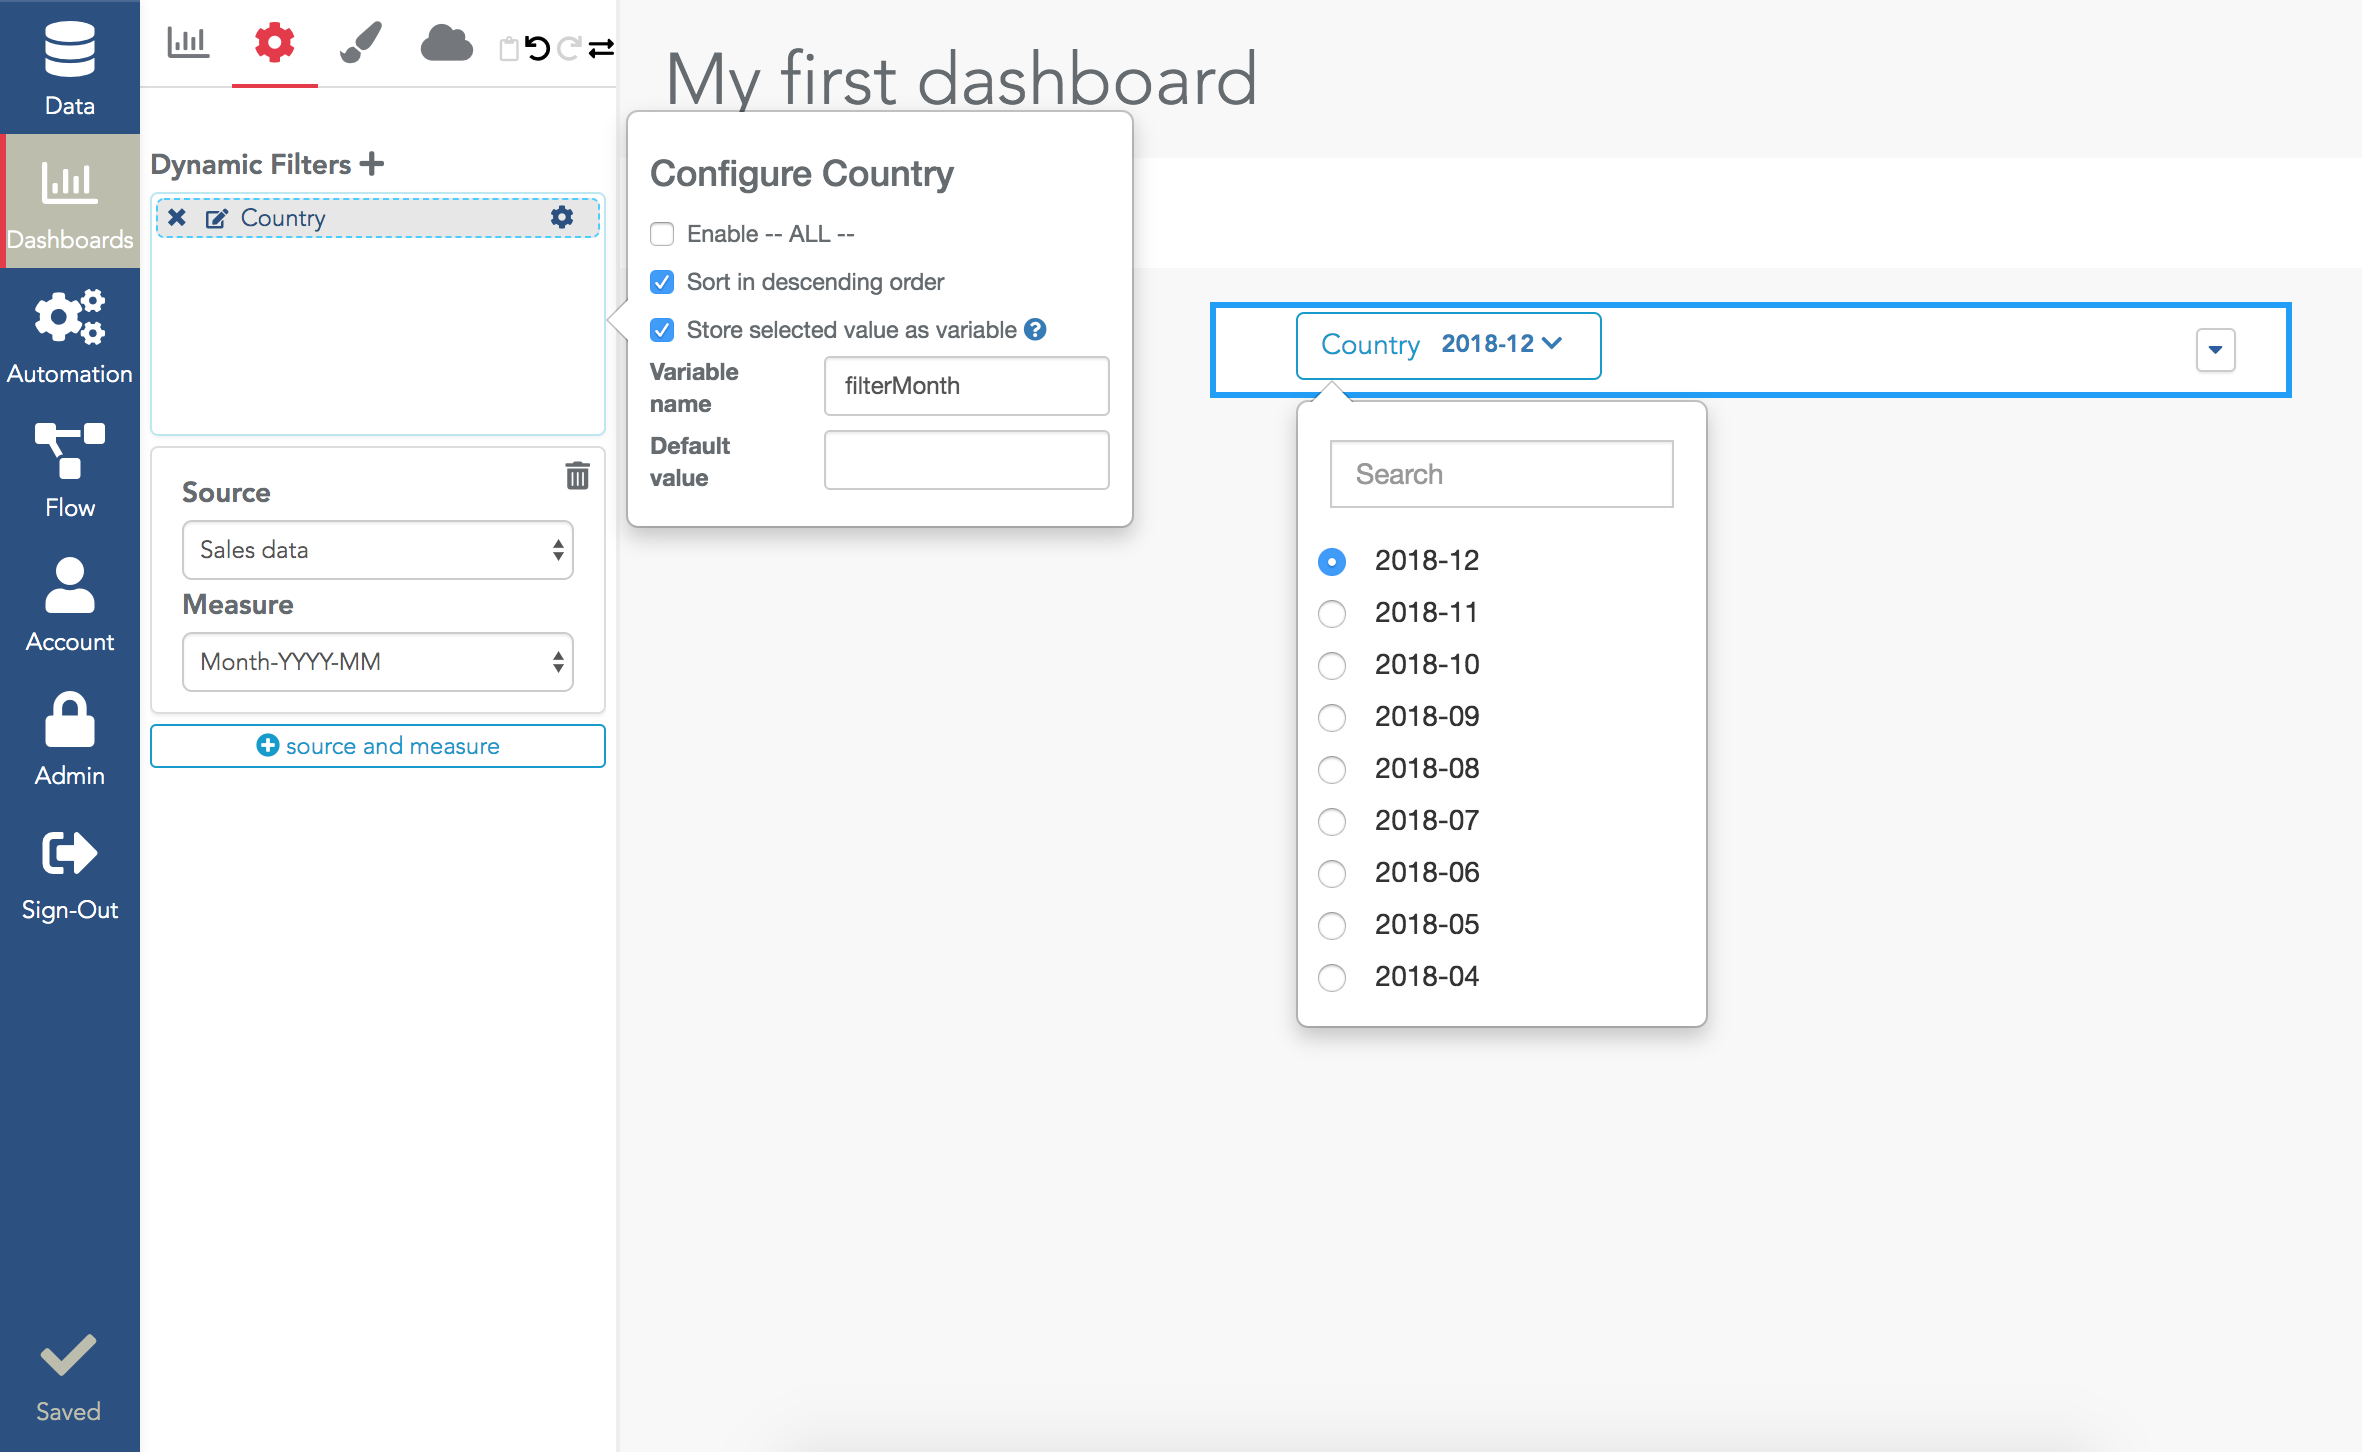
The previous examples are very quick to setup but in some advanced cases you cannot get exactly what you want. For these cases, you can store the value of the filter in a variable and then use it in the filters configuration of any of your widgets (i.e. you need to select the widget and edit its filter configuration).
If you name your variable "myVar" in the filter config, you can retrieve it in the filters with the "{{myVar}}" syntax.
This lets you use all the possible operators of widget filters (e.g. >, <, >=, <=, !=, contains...). You can also apply a function on the variable before using it in the widget. And you can also use it within a formula defined on the datasource.
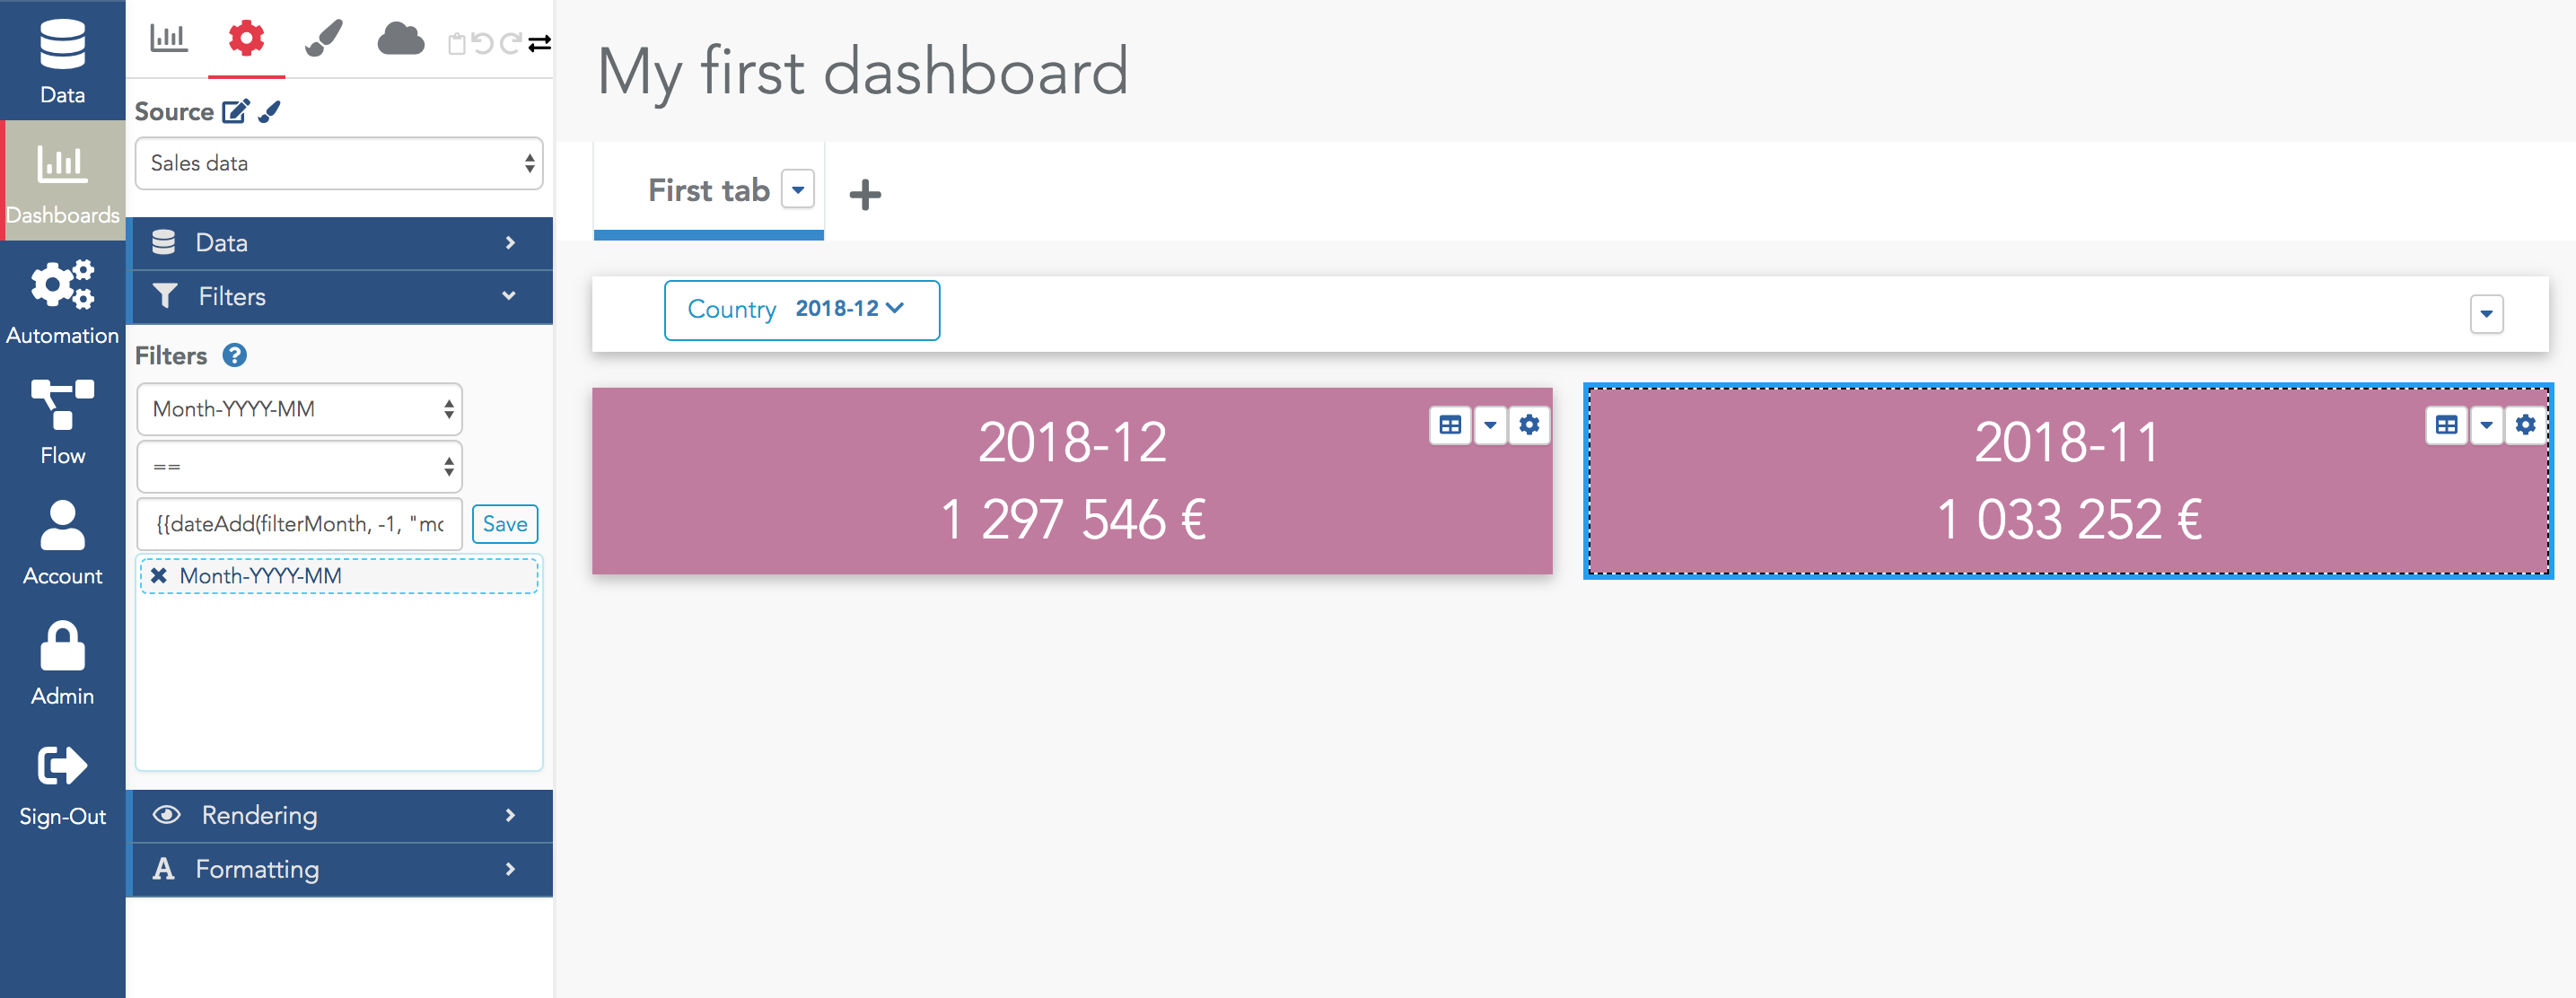
Here is an example. Let's store the result of the filter in the variable "filterMonth":
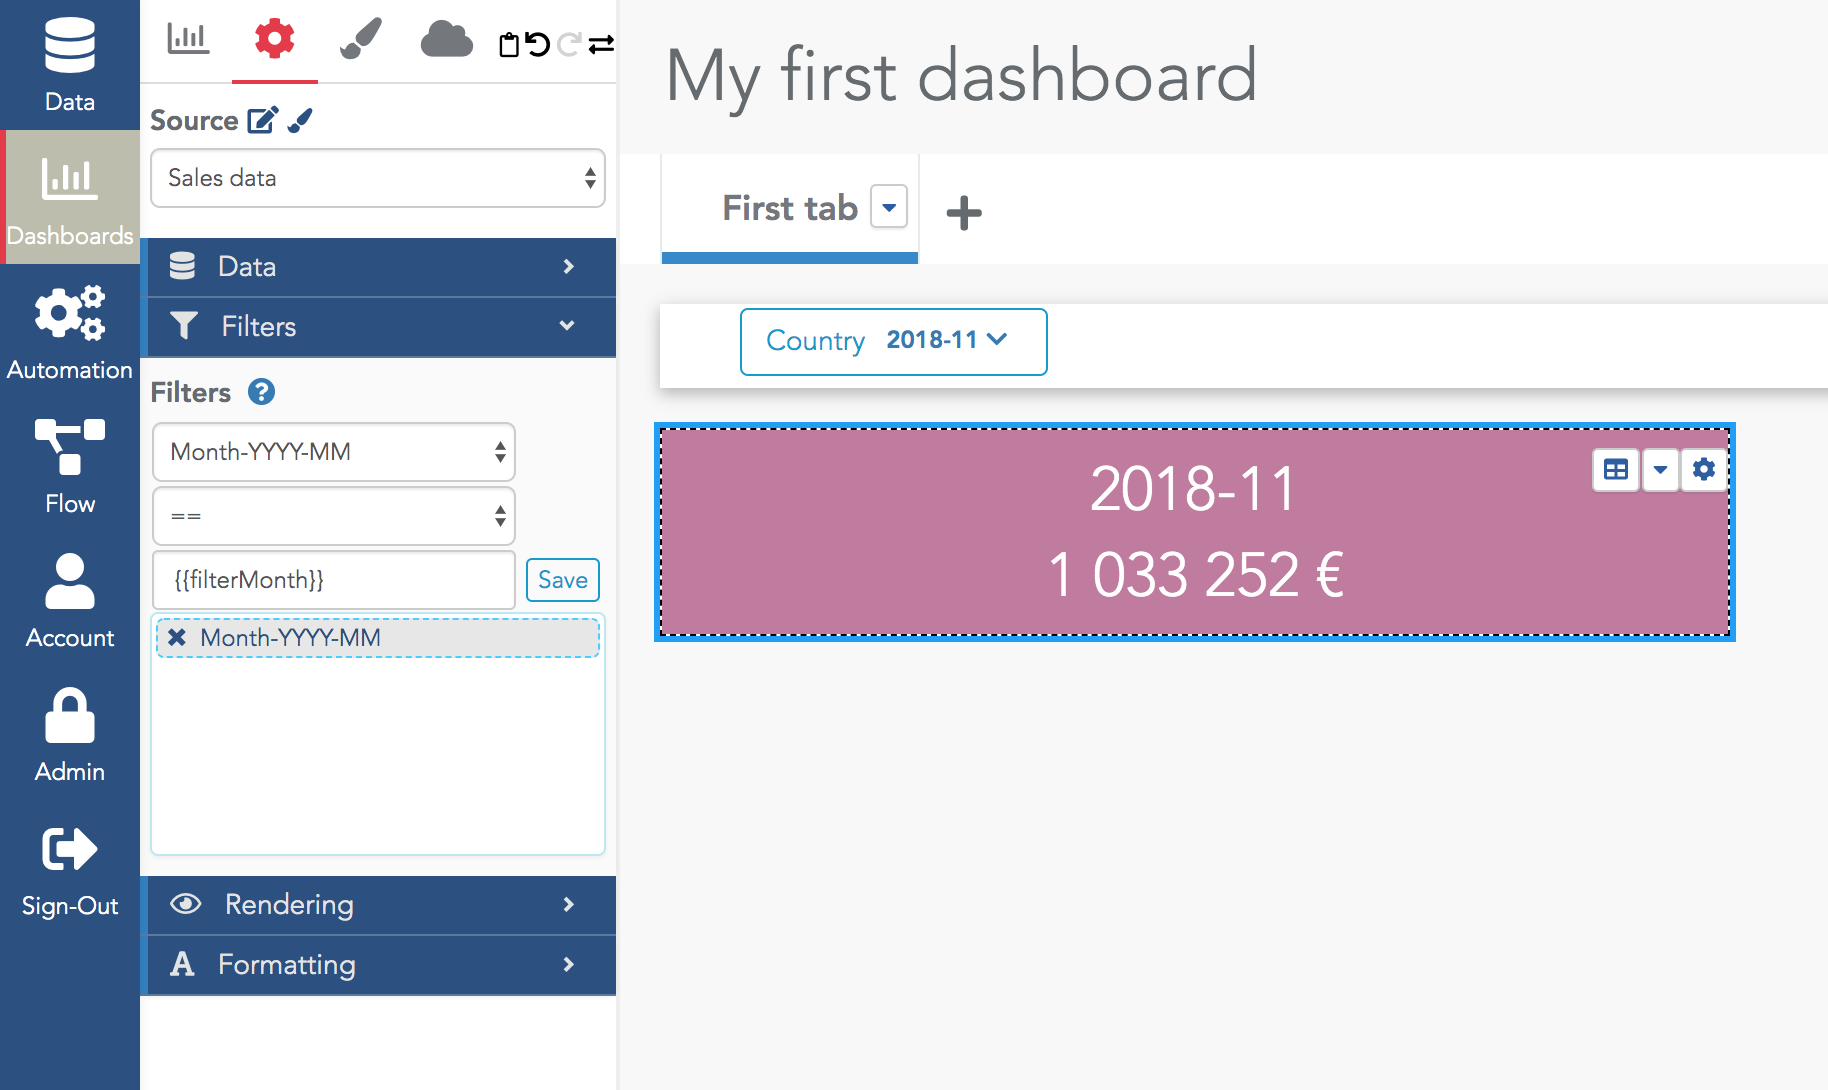
Then, we can create a second widget showing the same KPI for the previous month. In the filter of this widget, use the formula "{{dateAdd(filterMonth, -1, "month", "YYYY-MM")}}":